- About
- Getting Started
- How To?
- CSS & JS
- Structure
- WPBakery Page Builder
- Widgets
- Credits
- Changelog
- Support
GymBase - Gym Fitness WordPress Theme
Dedicated for webmasters seeking to establish an online home for a fitness center, Gymbase is the most popular and #1 selling gym WordPress Theme. Uniquely suited to work with fitness center and gym websites, Gymbase combines not only a vibrant, and professional visual styling but a number of niche market features such as Build-In Schedule Manager.
Gymbase layout is responsive and retina-ready, every single theme component has been tested to display perfectly on any device. Add to that uncomplicated and hassle-free initial setup as it involves a single-click demo content importer. Moreover, the integrated premium Slider Revolution and WPBakery drag & drop page builder requiring absolutely no coding knowledge and gives you total control over your website’s look and feel. Additionally, introduce your classes in a modern way and let your clients meet your staff and trainers. The built-in filterable and multi-column gallery will allow you to present your gym in the best possible way. This is by far one of our most polished products and we highly recommend it to anyone because thousands of users tested and proven this theme to deliver outstanding results for gyms and sports centers.
Theme Features
- Responsive design
- jQuery Powered
- Cost Calculator For WordPress (Value of $39) Included
- Slider Revolution Responsive WordPress Plugin (Value of $109) Included
- WPBakery Page Builder for WordPress (Value of $99) Included
- Streamline Premium Icon Font with 90+ Icons (Value of $69) Included
- Build-In Schedule (Timetable) Manager
- 50+ Page Builder Components Including 25+ Custom Made
- One Click Demo Content Importer
- Theme Options Panel
- WooCommerce Integration
- Theme Color Picker
- Sticky Menu
- Mobile Touch Friendly
- Ajax Contact Form
- Isotope Gallery
- Parallax Backgrounds
- Google Location Map
- 800+ Google Fonts to Choose From
- WPML Compatible. Translation Ready With Mo/Po Files
- Unlimited Menus & Sidebars
- Page Templates
- Home Style 1
- Home Style 2
- Blog
- Single Post
- Search Template
- About Us
- Team
- Single Team Member
- Our Classes
- Our Classes Style 2
- Single Class
- Gallery 2 Columns
- Gallery 2 Columns Style 2
- Gallery 3 Columns
- Gallery 3 Columns Style 2
- Gallery 4 Columns
- Gallery 4 Columns Style 2
- Daily Calorie Needs
- Body Mass Index
- Membership Pricing
- 404 Not Found
- Timetable
- Contact Style 1
- Contact Style 2
- Social Icons Font with 33 Icons to Choose From
- PSD Files Included (Please Contact Us to Receive Perfectly Organized PSD Files)
- Documentation Included
- Retina Ready
- Valid HTML5 Code
- Crossbrowser Compatible
- Clean Design
Instructional Videos
Need HTML (non - WordPress) version?
There is also HTML version of this theme available. You can find it here: GymBase - Gym Fitness Template
Getting Started
1. Downloading theme archive
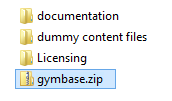
To install GymBase on your WordPress website, you need to download the theme archive file from your Downloads section on ThemeForest. Downloaded archive will look like this 'themeforest-TcOFFSgY-gymbase-responsive-gym-fitness-wordpress-theme.zip'. Please unzip this file and inside you will find 'gymbase.zip' archive (screenshot) which contains all theme files necessary to install the theme.
2. Theme installation
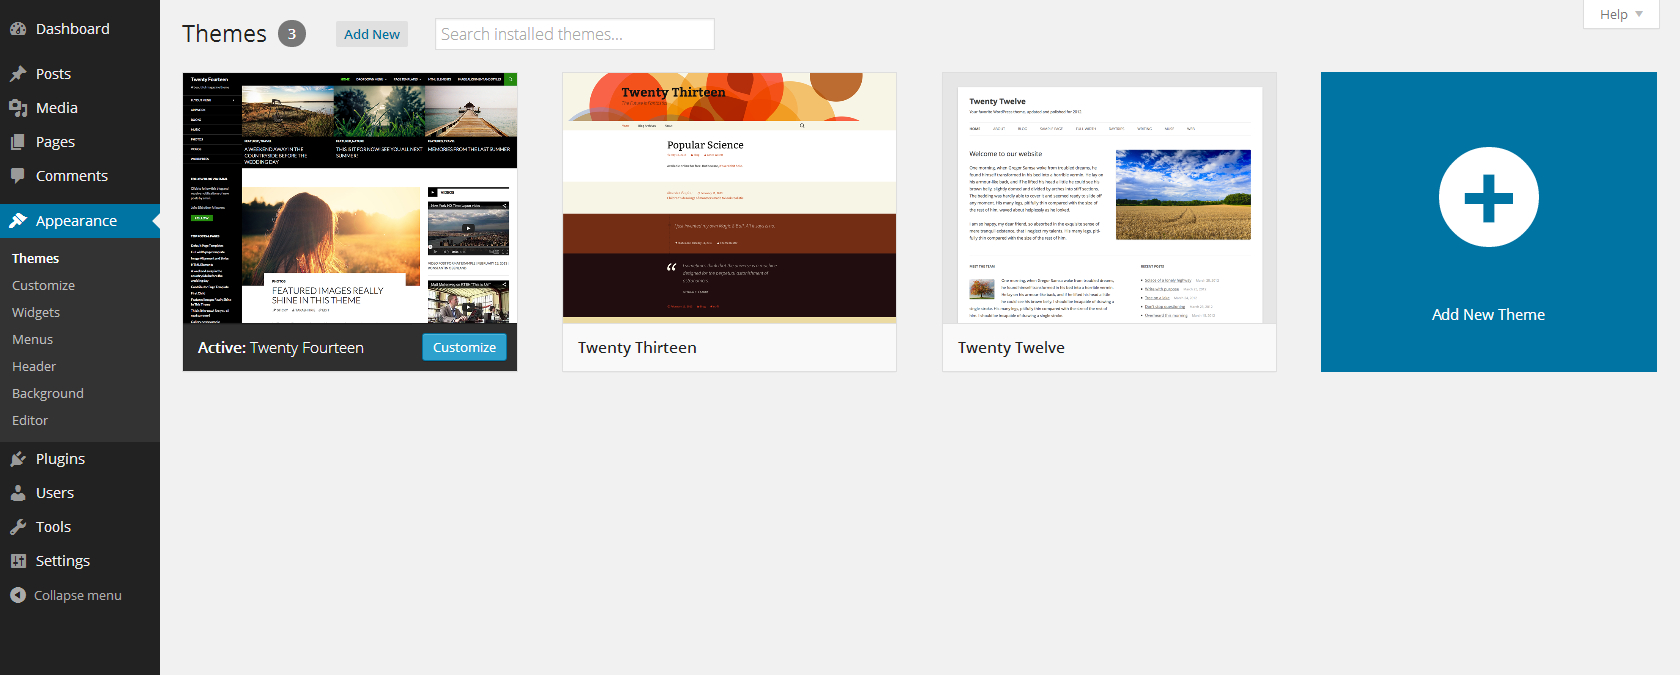
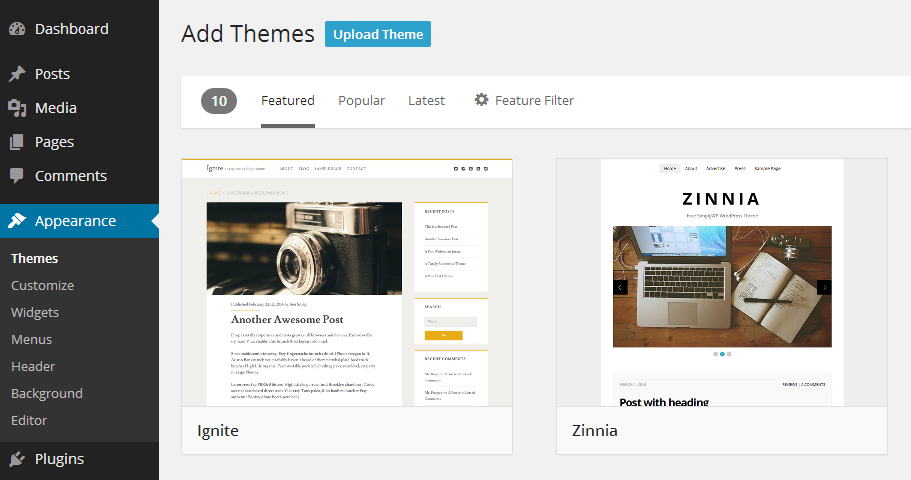
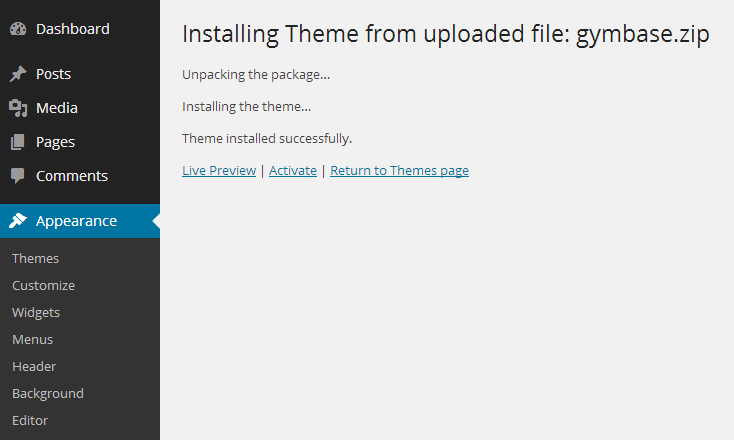
Please login to your WP dashboard and go to 'Appearance->Themes' panel, over there you can use the 'Add New' option to install new themes. Click on 'Upload Theme' button located at the top left corner of the screen (near the 'Add Themes' page title, screenshot) and select the 'gymbase.zip' file from your computer, now use the 'Install Now' button and if everything goes right, you should notice 'Theme installed successfully' message (screenshot), after that you can activate the theme.
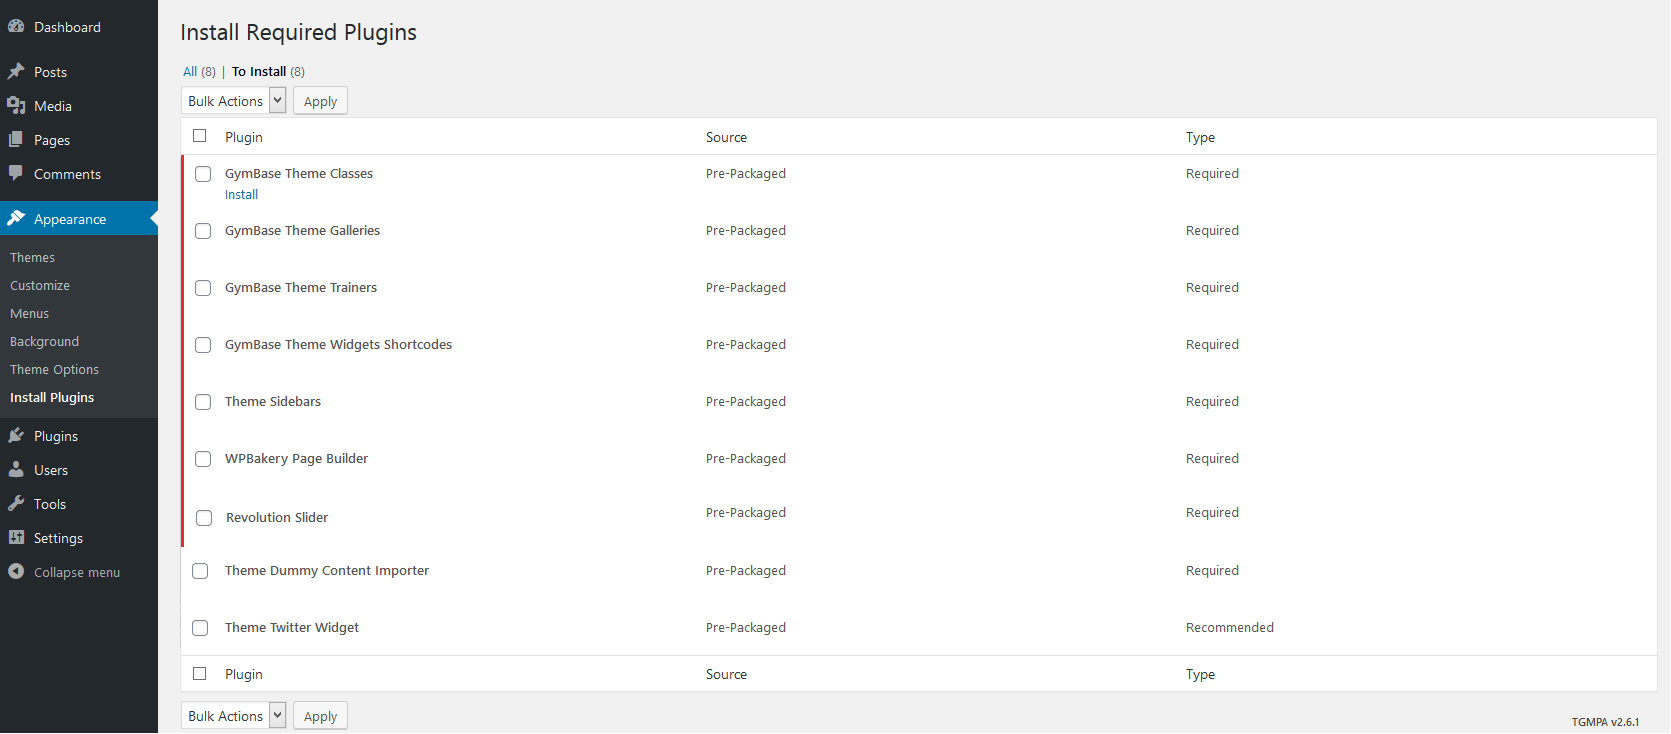
3. Plugins installation
Once the theme is active, you need to install required plugins, you can do that in 'Appearance->Install Plugins' panel. After installation please activate plugins if necessary.
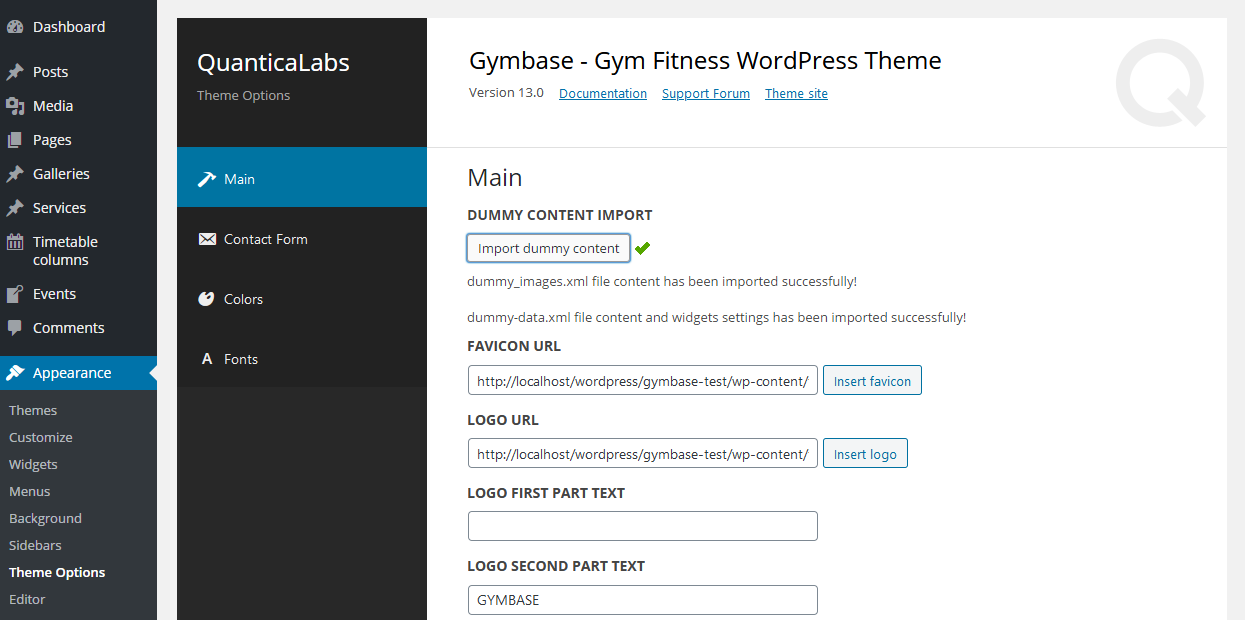
4. Dummy data import
The last thing is to import the dummy data, this will create sample content and configure your WordPress settings, making your website look exactly as in our preview version. This step is optional, you don't need to install dummy content if you don't need it but it will help you to see how content has been configured on demo site, you can also take it as a base for your customized website. To do this, please go to 'Appearance->Theme Options' panel and click on 'Import dummy content' button, please remember that this can take some time, so you should wait until the confirmation message is displayed (screenshot). After that, your website will be ready and now you can start adding your own content or customize the theme. All steps from the dummy content process can be viewed on this instructional video.
CSS Styles
The project uses the following cascade of theme styles (in order):
- animations.css - styles for animated elements,
- jquery.qtip.css - default styles for tooltips (overwritten in style.css),
- odometer-theme-default.css - styles for Odometer smoothly transitioning numbers plugin,
- superfish.css - default styles for superfish menu,
- prettyPhoto.css - default styles for prettyPhoto lightbox,
- style.css - base styles for the entire project,
- responsive.css - styles for responsive design (you can disable it under Appearance->Theme Options),
- reset.css - styles which resets default browsers styles.
Javascript Files
Plugins and library
- jQuery Easing v1.4.1 - https://gsgd.co.uk/sandbox/jquery/easing/,
- Isotope v3.0.6 - An exquisite jQuery plugin for magical layouts https://isotope.metafizzy.co,
- jQuery blockUI v2.70 - https://malsup.com/jquery/block/,
- qTip2 - Pretty powerful tooltips, https://github.com/qTip2/qTip2,
- jQuery prettyPhoto v3.1.6 - Simple lightbox alternative, http://www.no-margin-for-errors.com/projects/prettyphoto-jquery-lightbox-clone/,
- jQuery timeago - Plugin that makes it easy to support automatically updating fuzzy timestamps, https://timeago.yarp.com/,
- jQuery BBQ v1.2.1, Plugin which provide support for browser histry, http://benalman.com/projects/jquery-bbq-plugin/,
- Odometer v0.4.6, Plugin for Smoothly transitioning numbers, https://github.hubspot.com/odometer/,
- jQuery carouFredSel v6.2.1 - Carousel plugin, https://github.com/Codeinwp/carouFredSel-jQuery.
Other files:
- jquery.hint.js - script which supports hints/placeholders for form fields,
- main.js - script contains all executable instructions of jquery plugins, events handlers etc.
How To?
1. How to install GymBase theme?
Please read our Getting Started guide, it presents step-by-step instructions on how to install the theme. Alternatively you can install theme manually. In that case please connect with your FTP account using FTP client like FileZilla and now upload the unpacked theme directory to the 'wp-content/themes/' subdirectory, after that, you can activate it in Themes panel of WP dashboard.
2. What is the correct way to update the theme?
To update the theme you need to download its latest version from ThemeForest downloads page. Now there are two ways to update the theme, if you don't have any custom modifications then you can simply remove the old theme version from admin panel and install new one on 'Appearance->Themes' page. Otherwise, if you want to keep some theme files, which were modified, then you need to update it manually. Please unpack the downloaded theme archive, login to your FTP account using FTP client (e.g. FileZilla) and replace the current theme files by uploading the newest ones. If your theme has custom modifications then you can upload only those files which were changed in theme update, you can check those files in the documentation that's included in theme directory(Changelog section). This way you can keep most(or even all) of your modifications after the update.
3. How can I update the WPBakery Page Builder plugin?
Firstly you must update your theme to the latest version, which includes new version of WPBakery Page Builder plugin.
Now if you use WordPress MultiSite installation, then just go to 'Network->Plugins' panel and delete the 'WPBakery Page Builder' plugin. Login once again to your website dashboard and you will be asked to install the WPBakery plugin, follow the instructions and the update will be complete.
For standard WordPress installation, please login to your FTP account and go to 'wp-content/plugins/' subdirectory and delete entire 'js_composer/' folder, after that visit your WordPress dashboard. You should notice new message at the top of a screen, that asks you to install the required plugin, follow the instructions and the WPBakery Page Builder plugin will be installed.
4. How can I setup a Child Theme?
To setup a child theme please first install the theme and import dummy data, instructions can be found here. Now you need to create a new folder in '/wp-content/themes/' subdirectory, you can name it 'gymbase-child' and then add two files: style.css and functions.php. In 'style.css' file please use below code:
/*
Theme Name:   GymBase Child
Description:  GymBase Child Theme
Template:     gymbase
Version:      1.0
Text Domain:  gymbase
*/
above code includes basic details about your child theme, you can edit above information as you like. For the second file 'functions.php' please use this code:
<?php
function child_theme_enqueue_styles() {
	wp_enqueue_style("parent-style", get_template_directory_uri() . "/style.css", array("reset", "superfish", "prettyPhoto", "jquery-qtip", "odometer"));
}
add_action("wp_enqueue_scripts", "child_theme_enqueue_styles");
above code loads the styles of parent gymbase theme. Now in your WP dashboard go to Themes panel and activate the 'GymBase Child' theme, you will also need to activate the WPBakery Page Builder plugin and it is possible that WordPress will deactivate widgets and main menu, so you will need to re-assign them in Widgets and Menus panel. After that your child theme should be working correctly. More details about Child Themes can be found here: https://codex.wordpress.org/Child_Themes
5. How can I translate the theme?
Theme supports translations. To create your language translation, please download this usefull tool Poedit. Then find in languages directory gymbase.po file and open it in Poedit.
Translate appropriate texts and save the file giving it appropriate name (check here for more). For example French: fr_FR, German: de_DE, etc.
The last step is setting the language in wp-config.php file. Please open it and find (or add if it doesn't exists) below line:
define ('WPLANG', '');
Then set your language, for example French:
define ('WPLANG', 'fr_FR');
6. How can I control the single post layout?
If you have imported dummy content you should see 'Single Post Template' page under 'Pages' admin menu. Please edit it using WPBakery Page Builder editor to control single post layout.
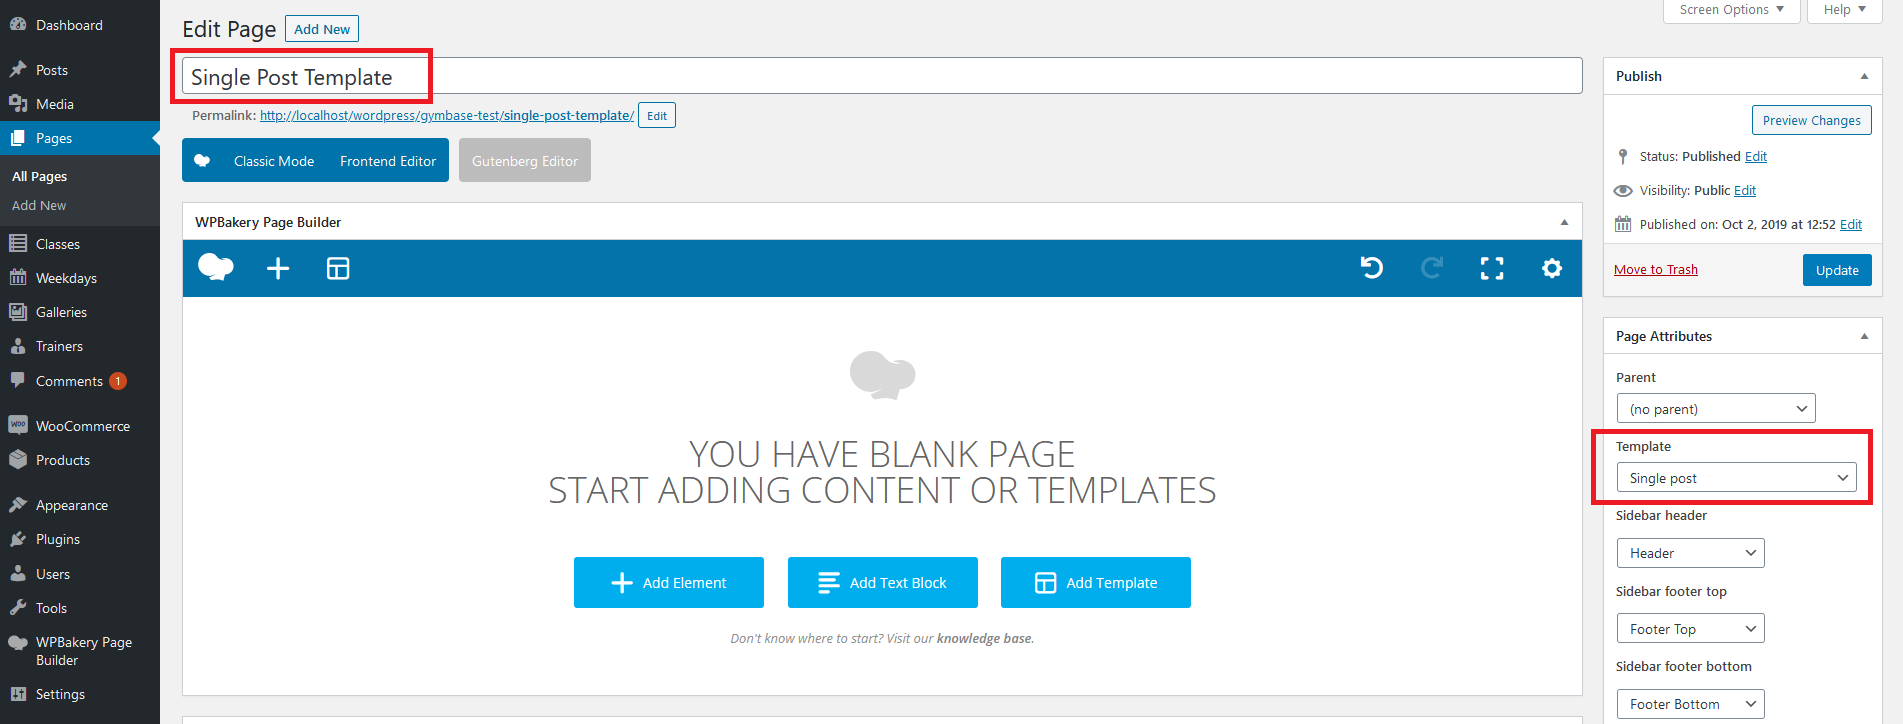
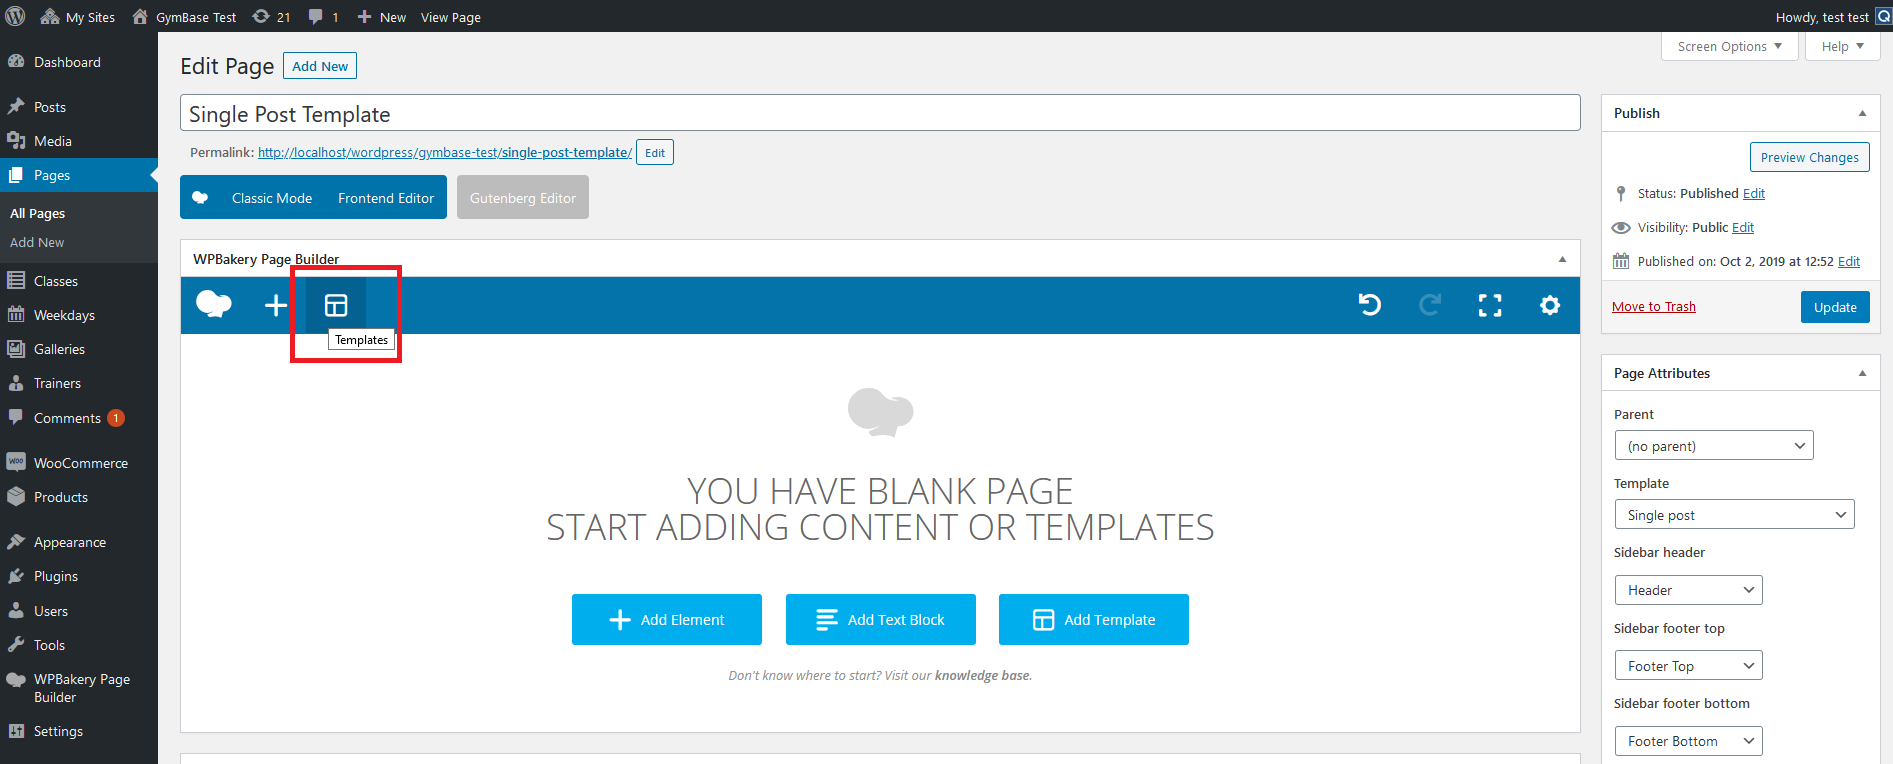
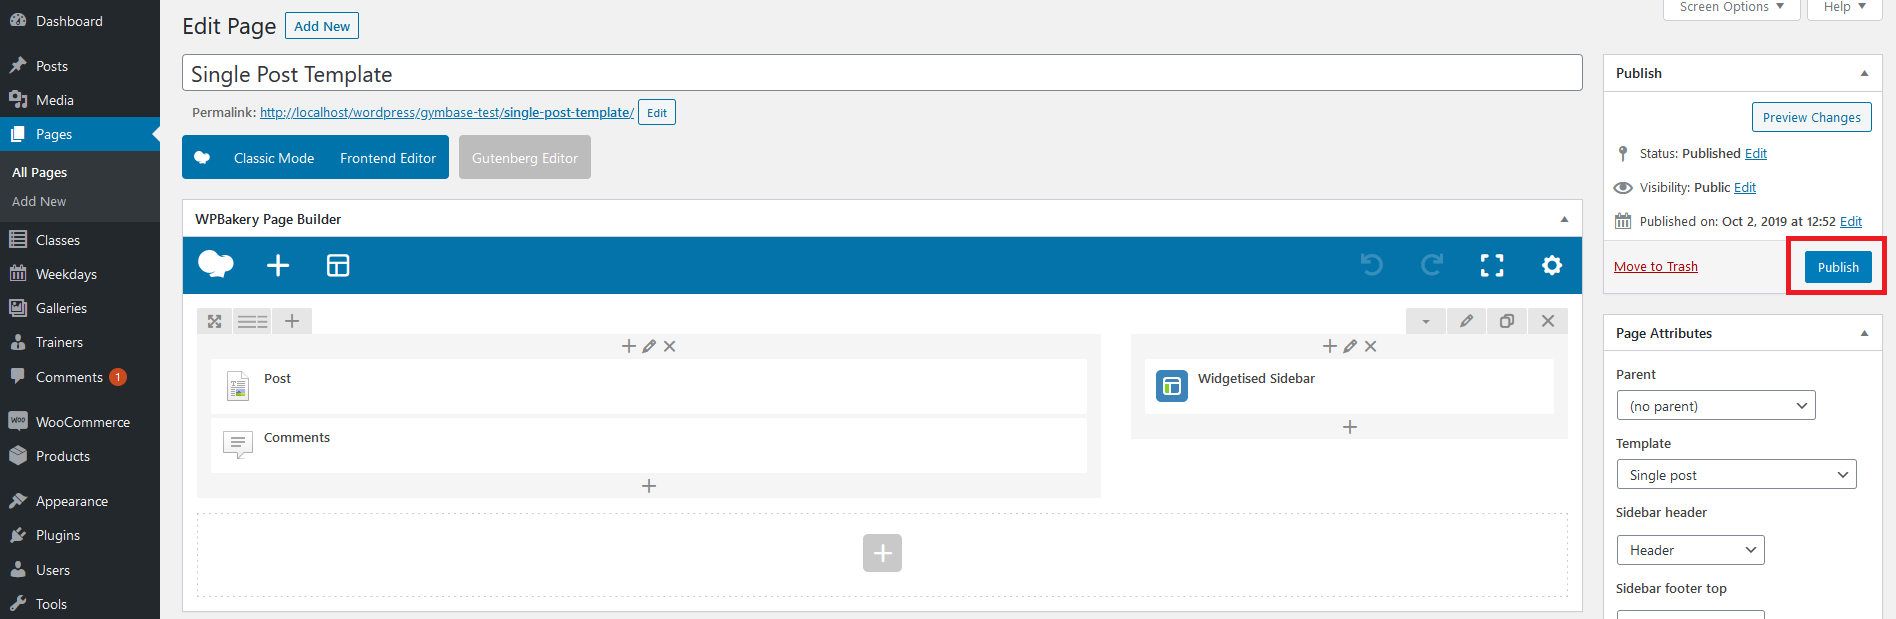
If you haven't imported dummy content you can create this template from scratch. To do that please add new page: 'Pages->Add New'. Name it 'Single Post Template' and select 'Single post' template for it under 'Page Attributes' box (screenshot). After that please switch content editor to WPBakery Page Builder by clicking 'Backend Editor' button and click on 'Templates' button (screenshot).
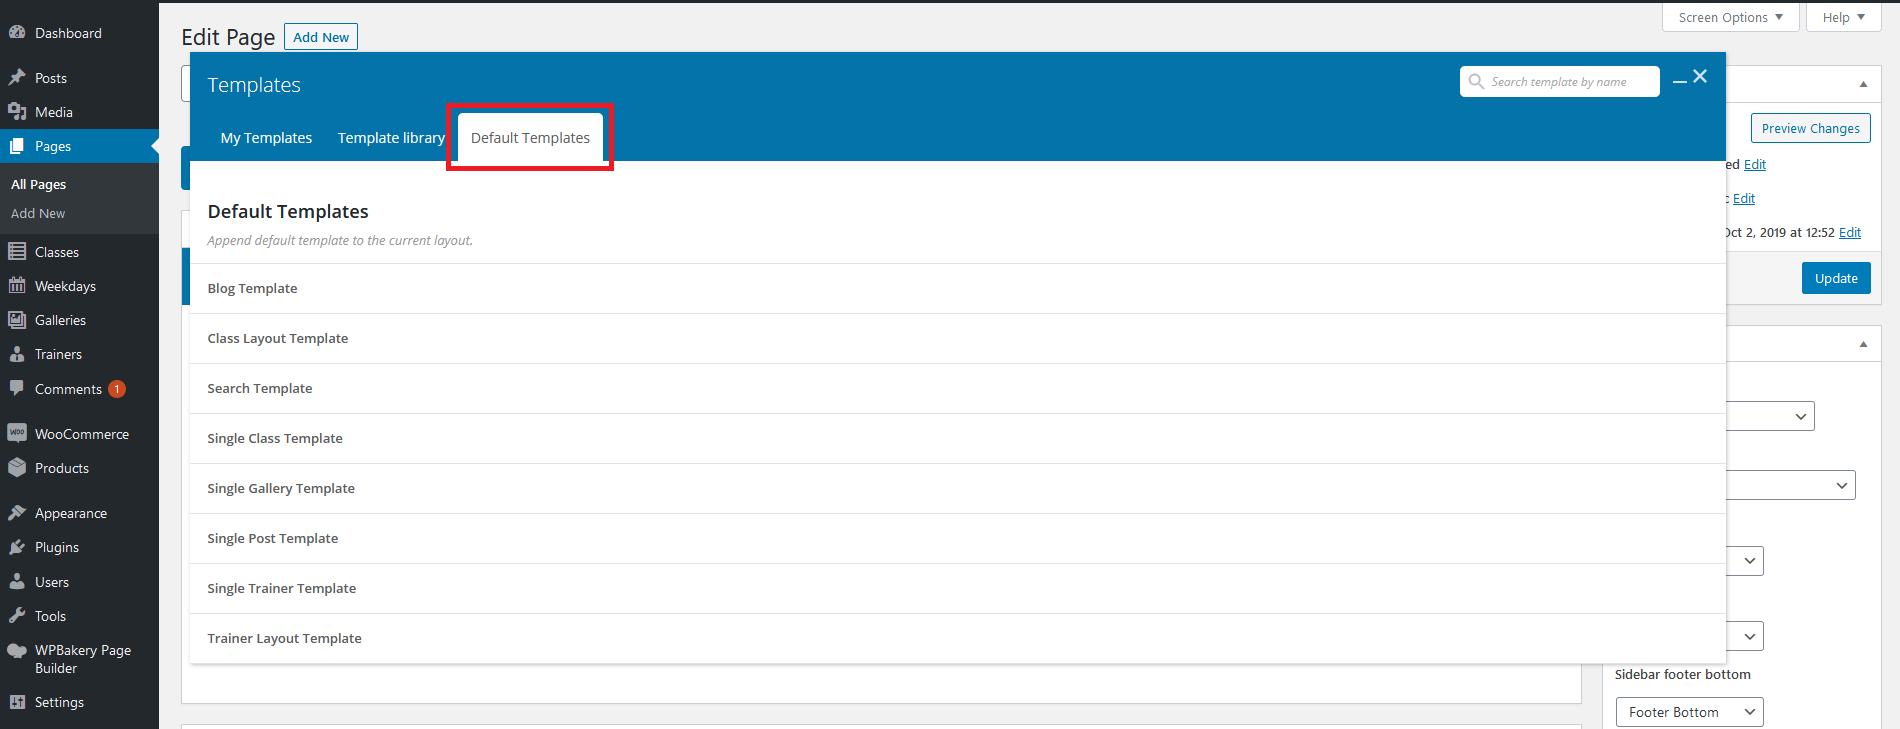
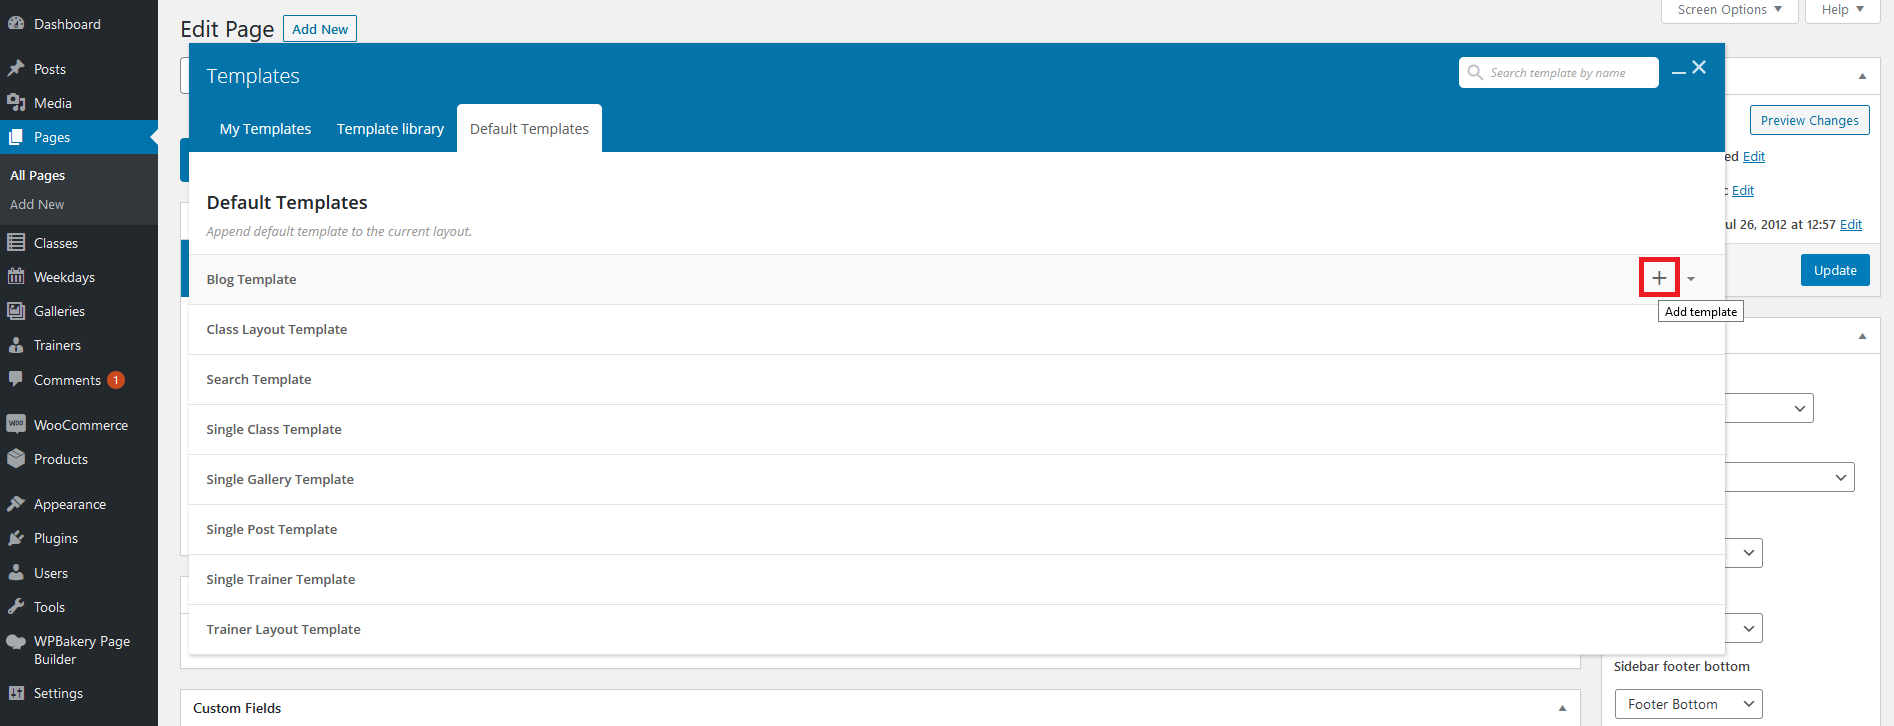
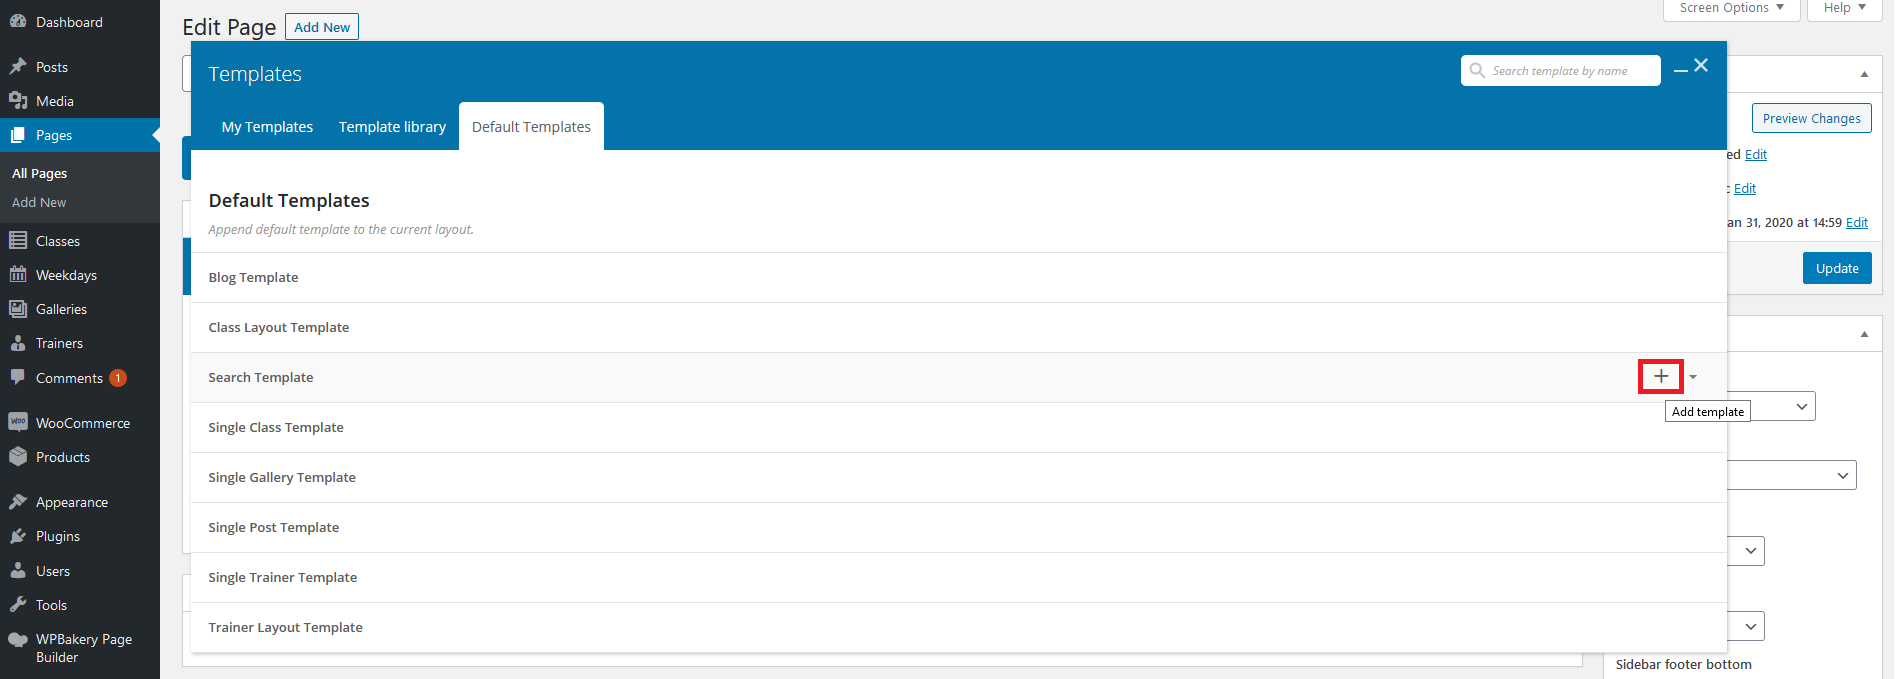
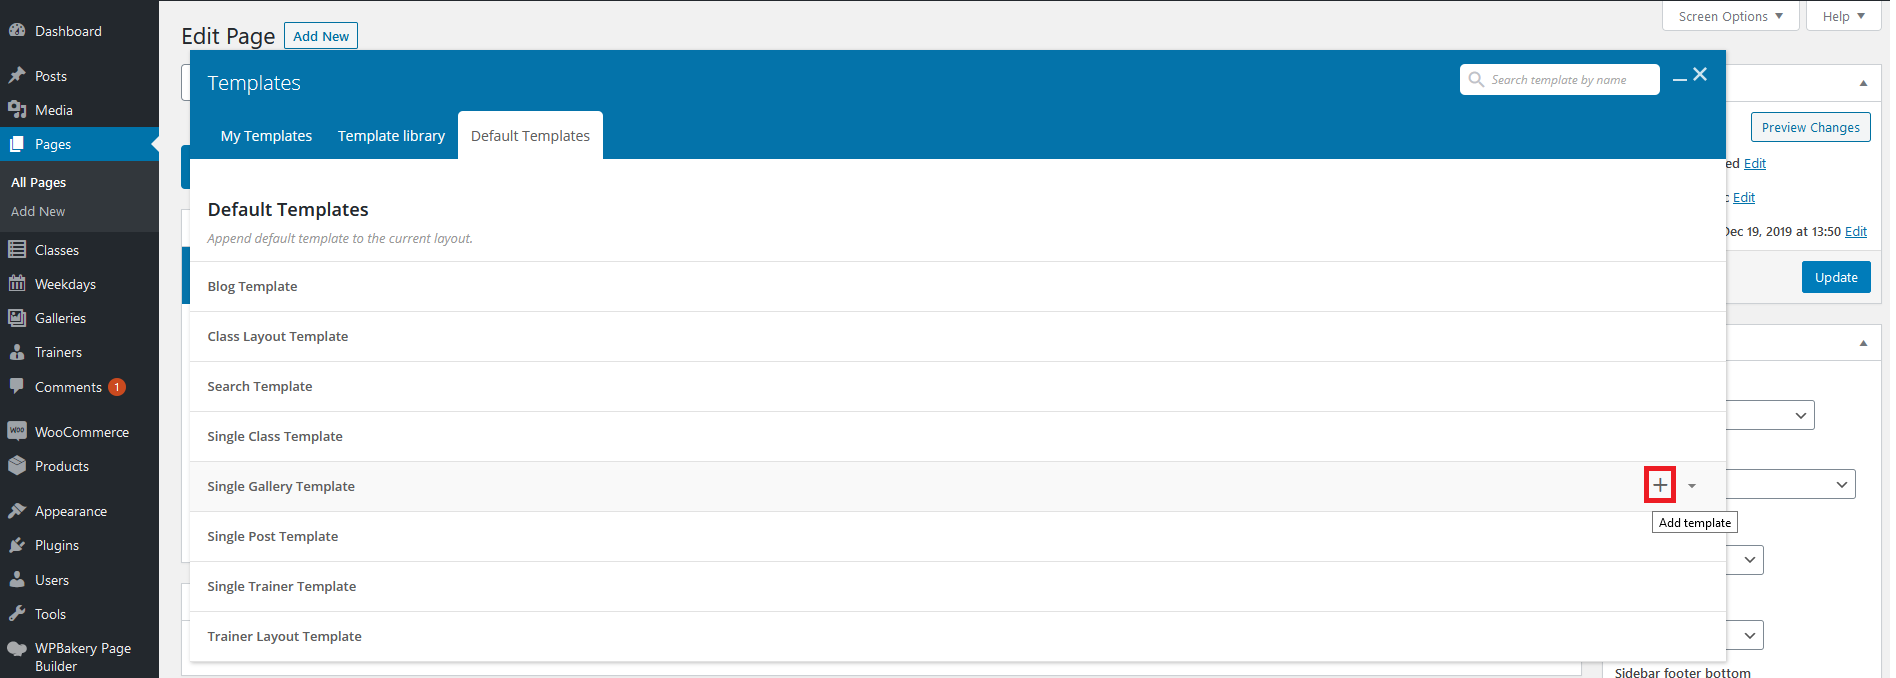
The templates popup will be displayed, please select 'Default templates' tab from it (screenshot). Find 'Single Post Template' on the list and click on it (screenshot). Close the 'Templates' window. Template is ready, please publish it (screenshot) and from now you can edit it to control single post layout.
7. How can I control the blog layout?
If you have imported dummy content you should see 'Blog Template' page under 'Pages' admin menu. Please edit it using WPBakery Page Builder editor to control blog layout.
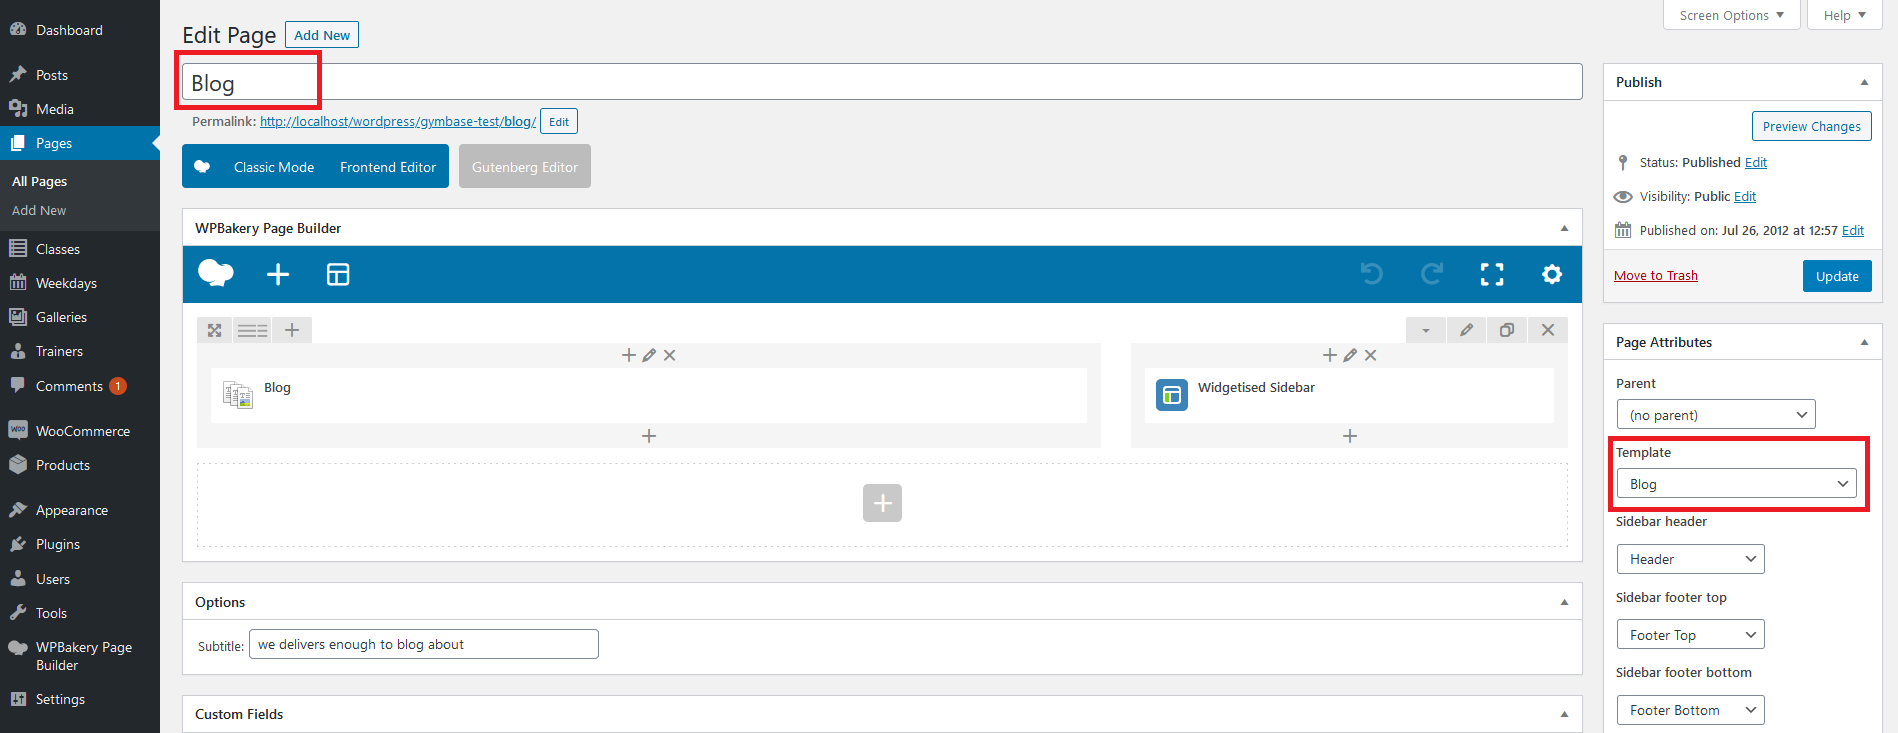
If you haven't imported dummy content you can create this template from scratch. To do that please follow the instructions from point 6 (How can I control the single post layout?) but name the page 'Blog Template' and select 'Blog' template for it under 'Page Attributes' box (screenshot). Please also use the 'Blog Template' as base for it (screenshot).
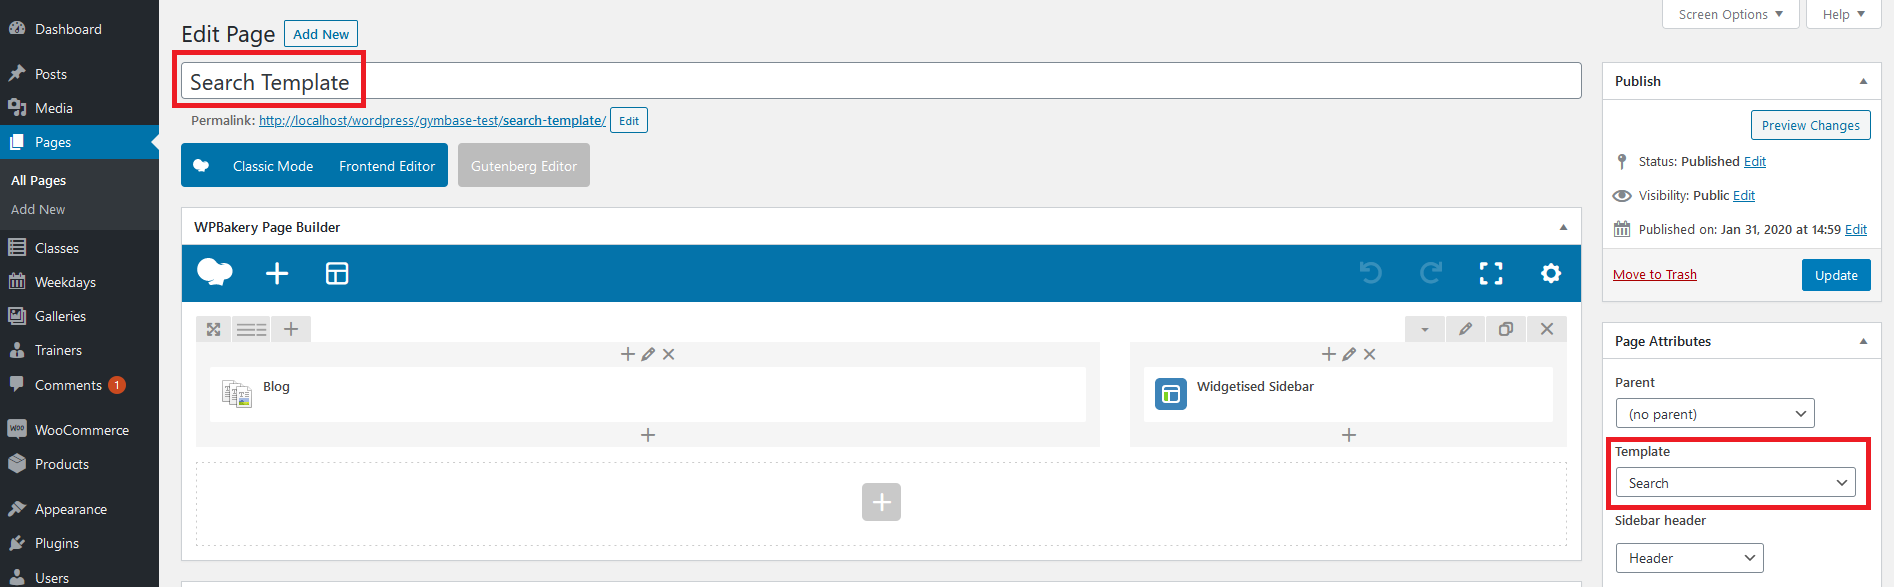
8. How can I control the search results page layout?
If you have imported dummy content you should see 'Search Template' page under 'Pages' admin menu. Please edit it using WPBakery Page Builder editor to control search results page layout.
If you haven't imported dummy content you can create this template from scratch. To do that please follow the instructions from point 6 (How can I control the single post layout?) but name the page 'Search Page Template' and select 'Search' template for it under 'Page Attributes' box (screenshot). Please also use the 'Search Template' as base for it (screenshot).
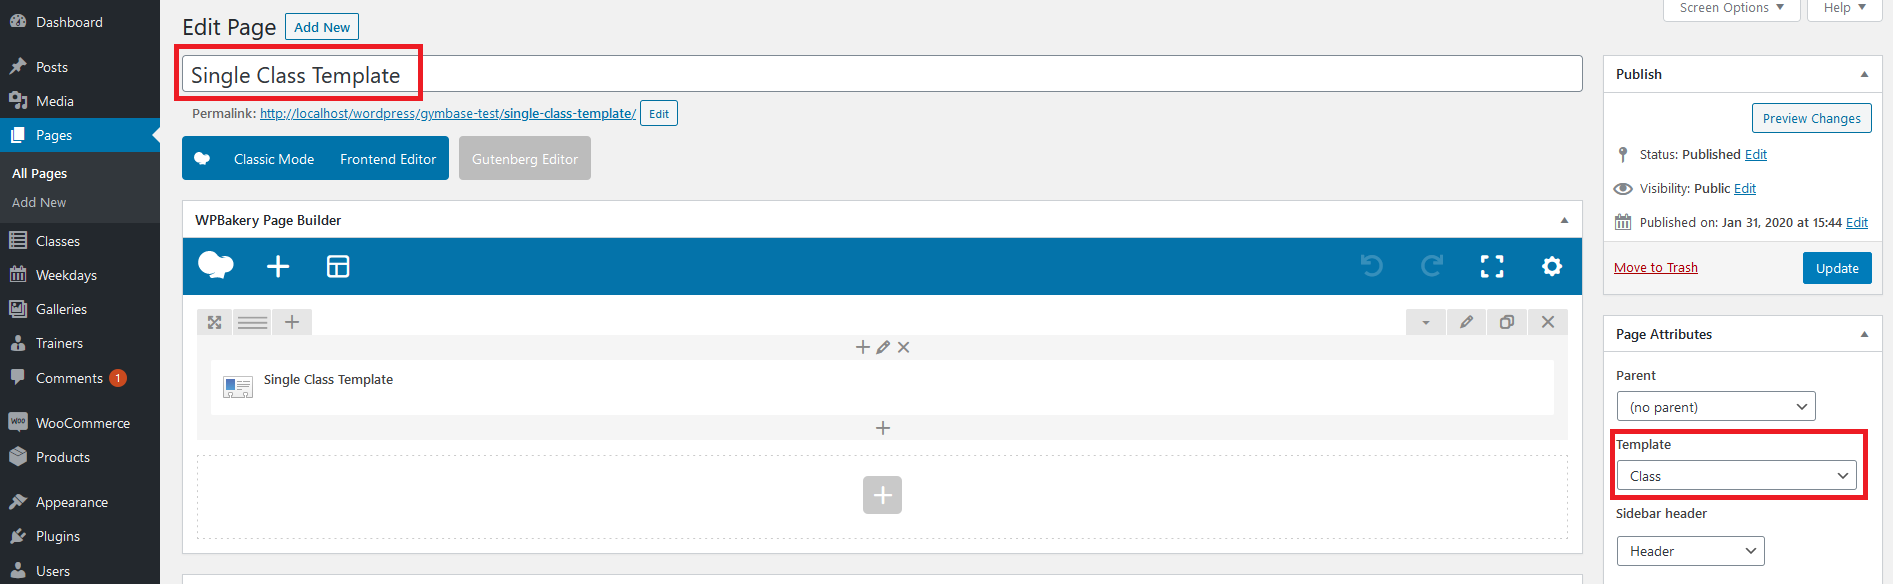
9. How can I control the single class page layout?
If you have imported dummy content you should see 'Single Class Template' page under 'Pages' admin menu. Please edit it using WPBakery Page Builder editor to control single class page layout.
If you haven't imported dummy content you can create this template from scratch. To do that please follow the instructions from point 6 (How can I control the single post layout?) but name the page 'Single Class Template' and select 'Class' template for it under 'Page Attributes' box (screenshot). Please also use the 'Single Project Template' as base for it (screenshot).
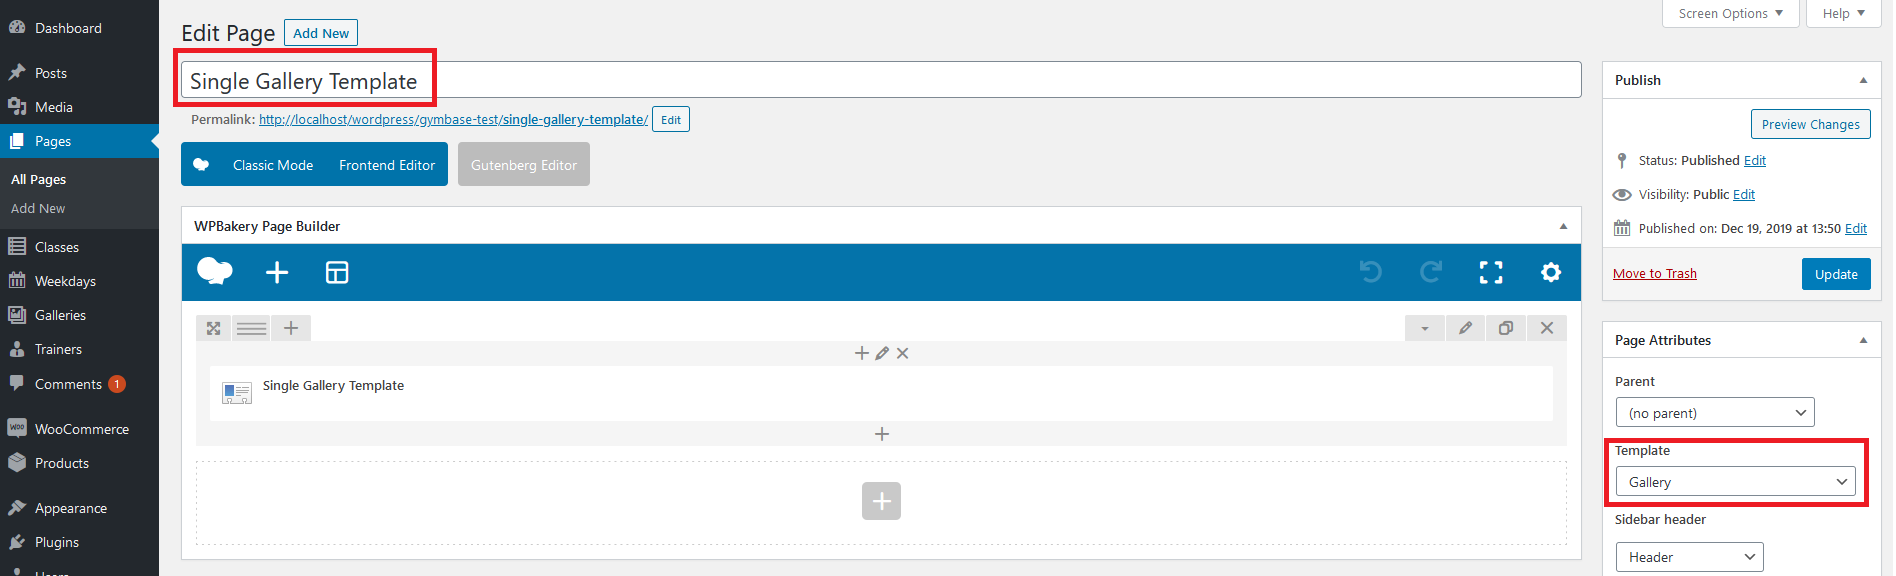
10. How can I control the single gallery page layout?
If you have imported dummy content you should see 'Single Gallery Template' page under 'Pages' admin menu. Please edit it using WPBakery Page Builder editor to control single gallery page layout.
If you haven't imported dummy content you can create this template from scratch. To do that please follow the instructions from point 6 (How can I control the single post layout?) but name the page 'Single Gallery Template' and select 'Gallery' template for it under 'Page Attributes' box (screenshot). Please also use the 'Single Gallery Template' as base for it (screenshot).
11. How can I control the single trainer page layout?
If you have imported dummy content you should see 'Single Trainer Template' page under 'Pages' admin menu. Please edit it using WPBakery Page Builder editor to control single team member page layout.
If you haven't imported dummy content you can create this template from scratch. To do that please follow the instructions from point 6 (How can I control the single post layout?) but name the page 'Single Trainer Template' and select 'Trainer' template for it under 'Page Attributes' box (screenshot). Please also use the 'Single Trainer Template' as base for it (screenshot).
12. How to integrate WooCommerce (shop) plugin?
Please check this instructional video to see how to setup Shop.
13. How to control Theme Options?
You can control Theme Options in WP Dashboard area under 'Appearance->Theme Options'.
14. What steps should I take after update from version 12.1 and lower?
GymBase from version 13.0 is not fully backward compatible. We've added many improvements in code and for the layouts. So if you were using version 12.1 or lower and you have just updated theme, please follow below steps:
1. Clear browser cache.
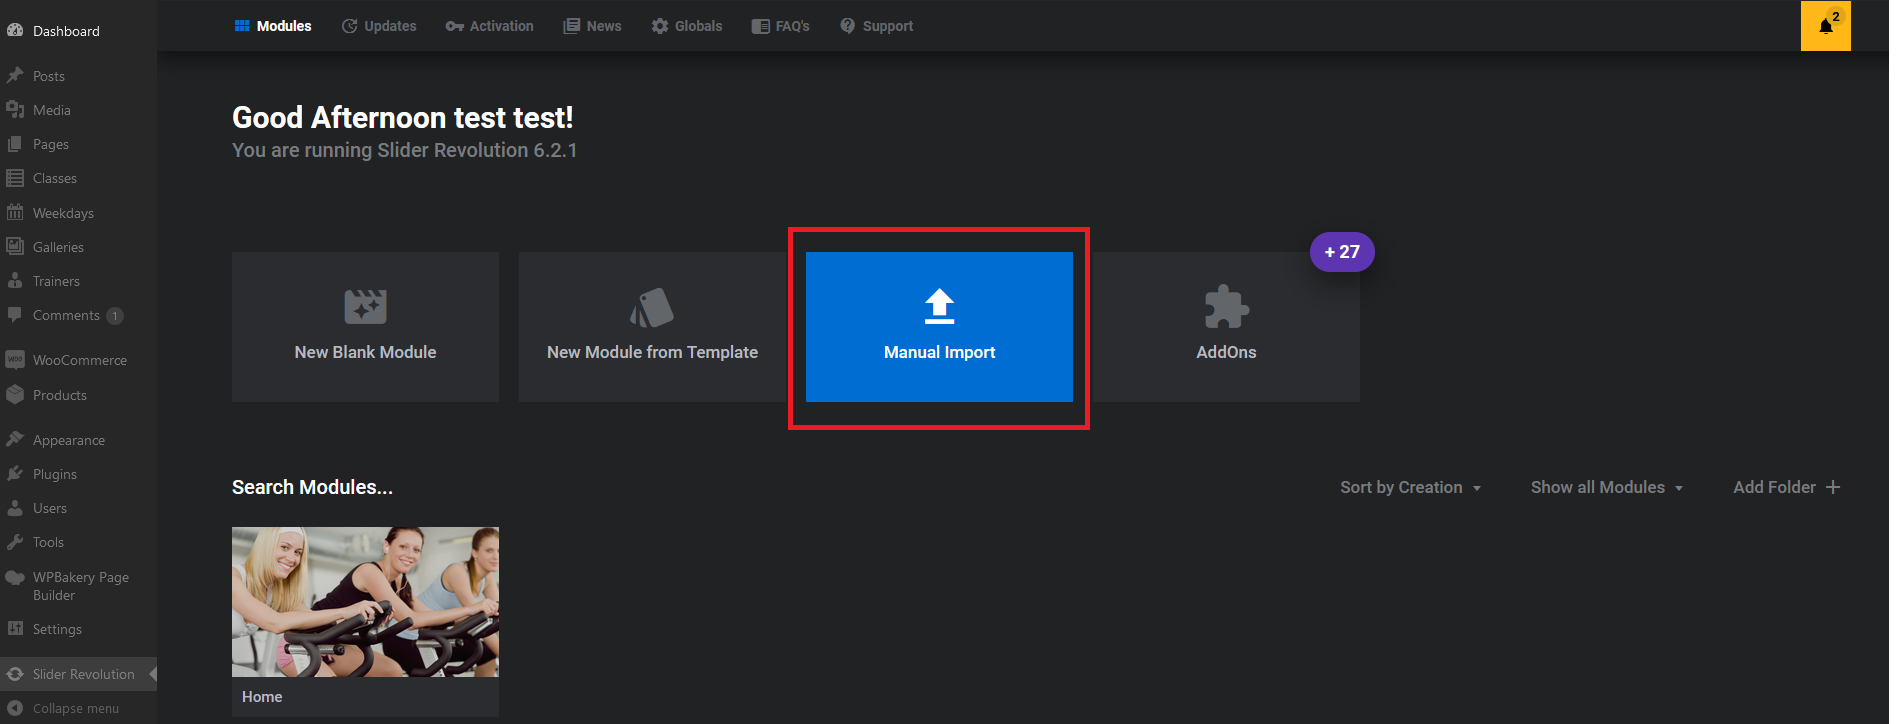
2. Home Slider has been replaced with Slider Revolution plugin. You can import new slider under 'Slider Revolution' menu in admin area (screenshot). For import, please use gymbase-home.zip file which you will find in 'dummy_content_files' directory in the theme package downloaded from ThemeForest.
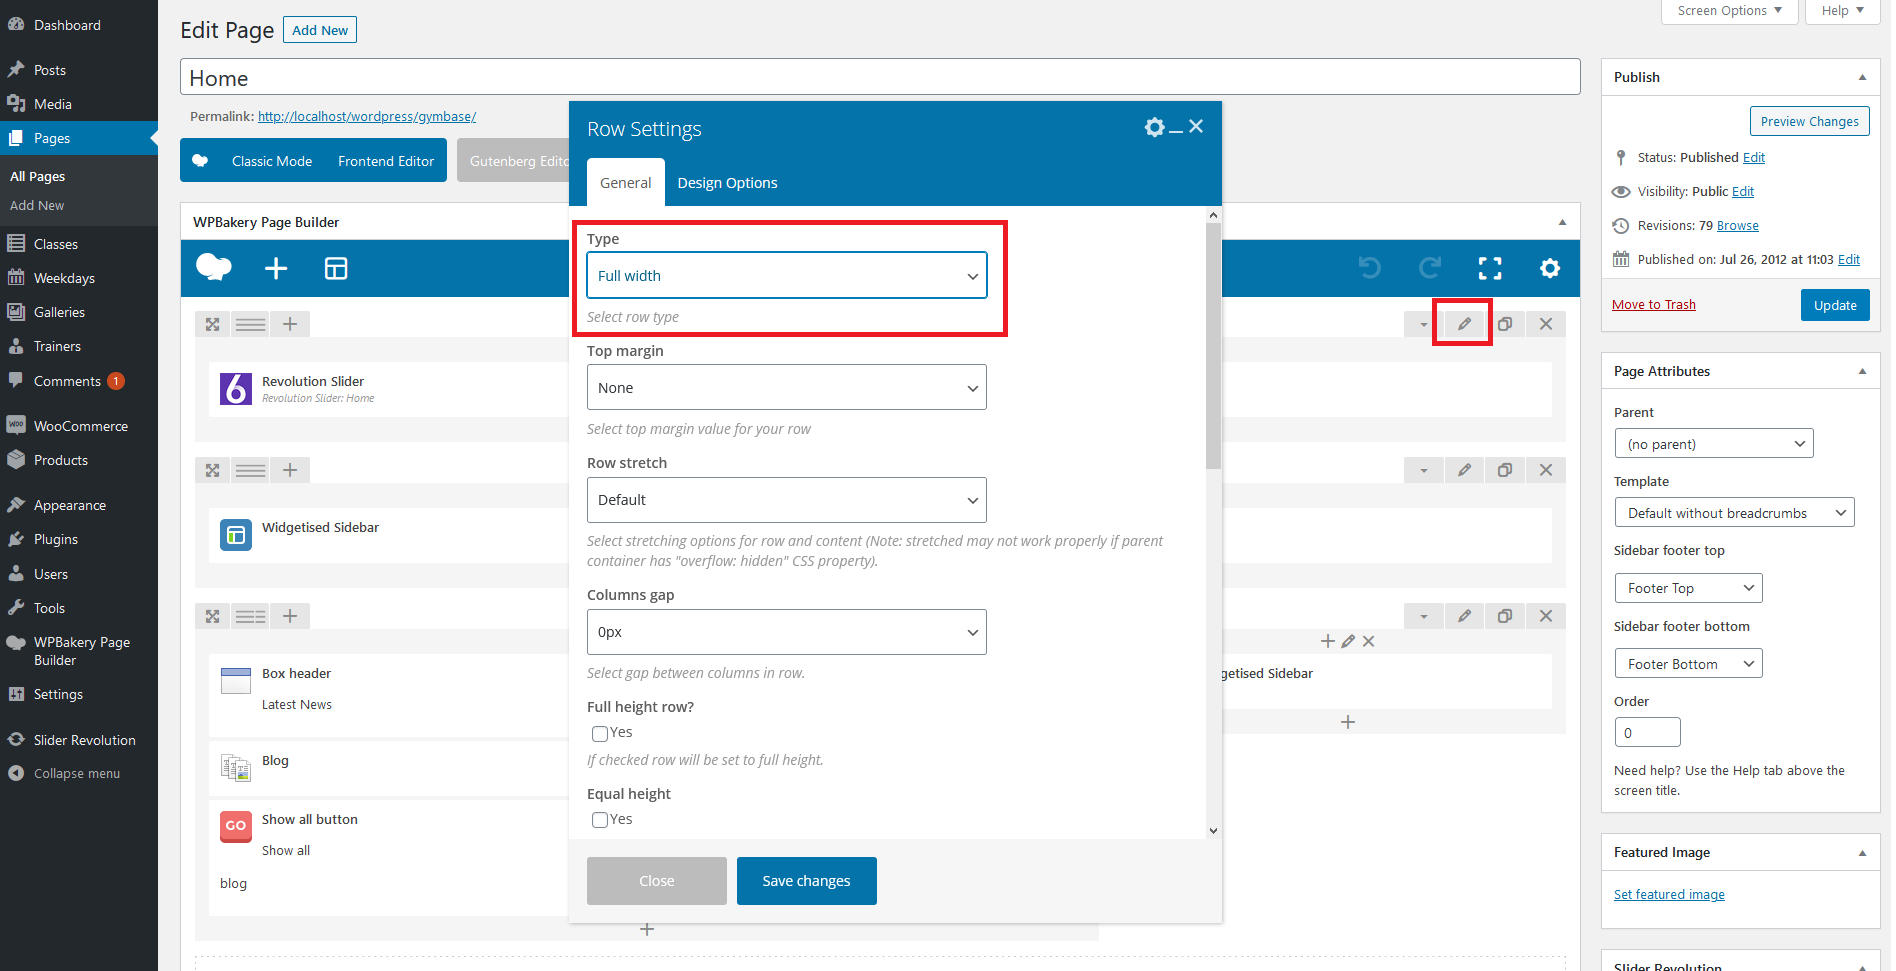
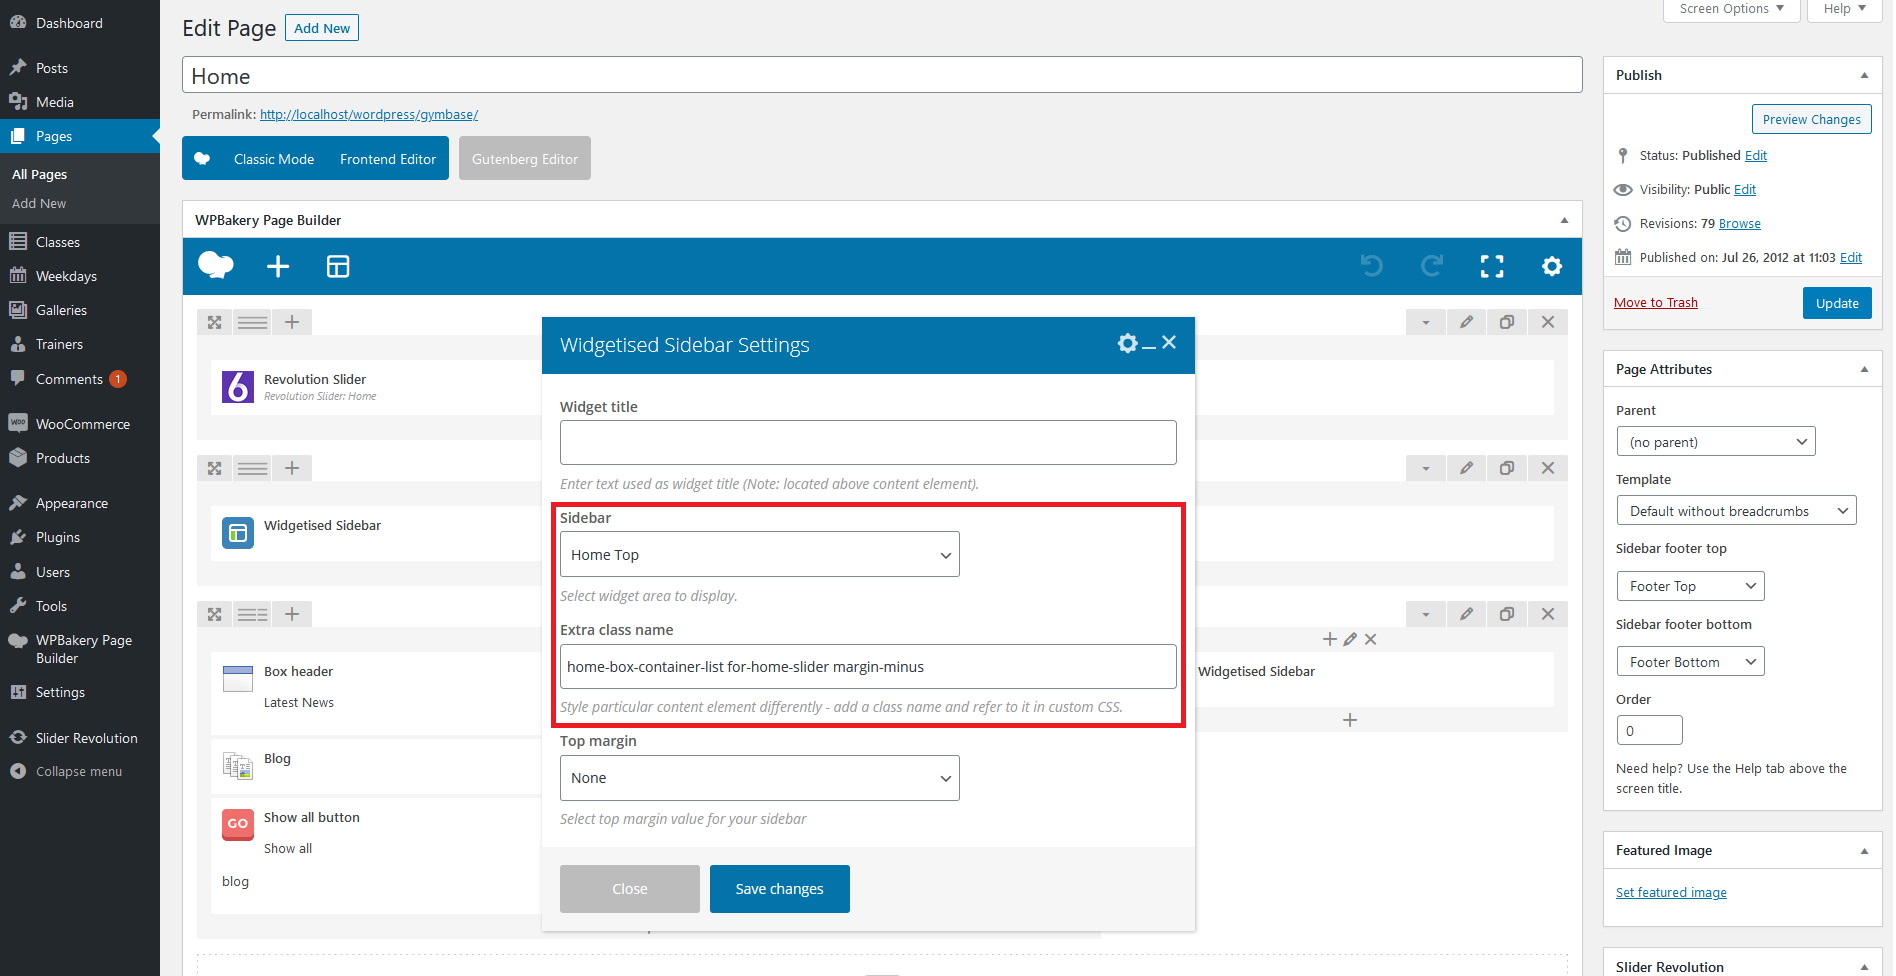
After the import please open your home page for edit and set the 'Template' for it to 'Default without breadcrumbs' (screen). Then please add new row in the content editor and insert 'Revolution Slider' component to it. In the row settings, please set 'Full width' type (screenshot). If you would like to have sidebar with home boxes on the slider, please add another row and insert 'Widgetised Sidebar' component to it. In the 'Widgetised Sidebar' component settings, please choose 'Home Top' and set home-box-container-list for-home-slider margin-minus in the 'Extra class name' field (screenshot).
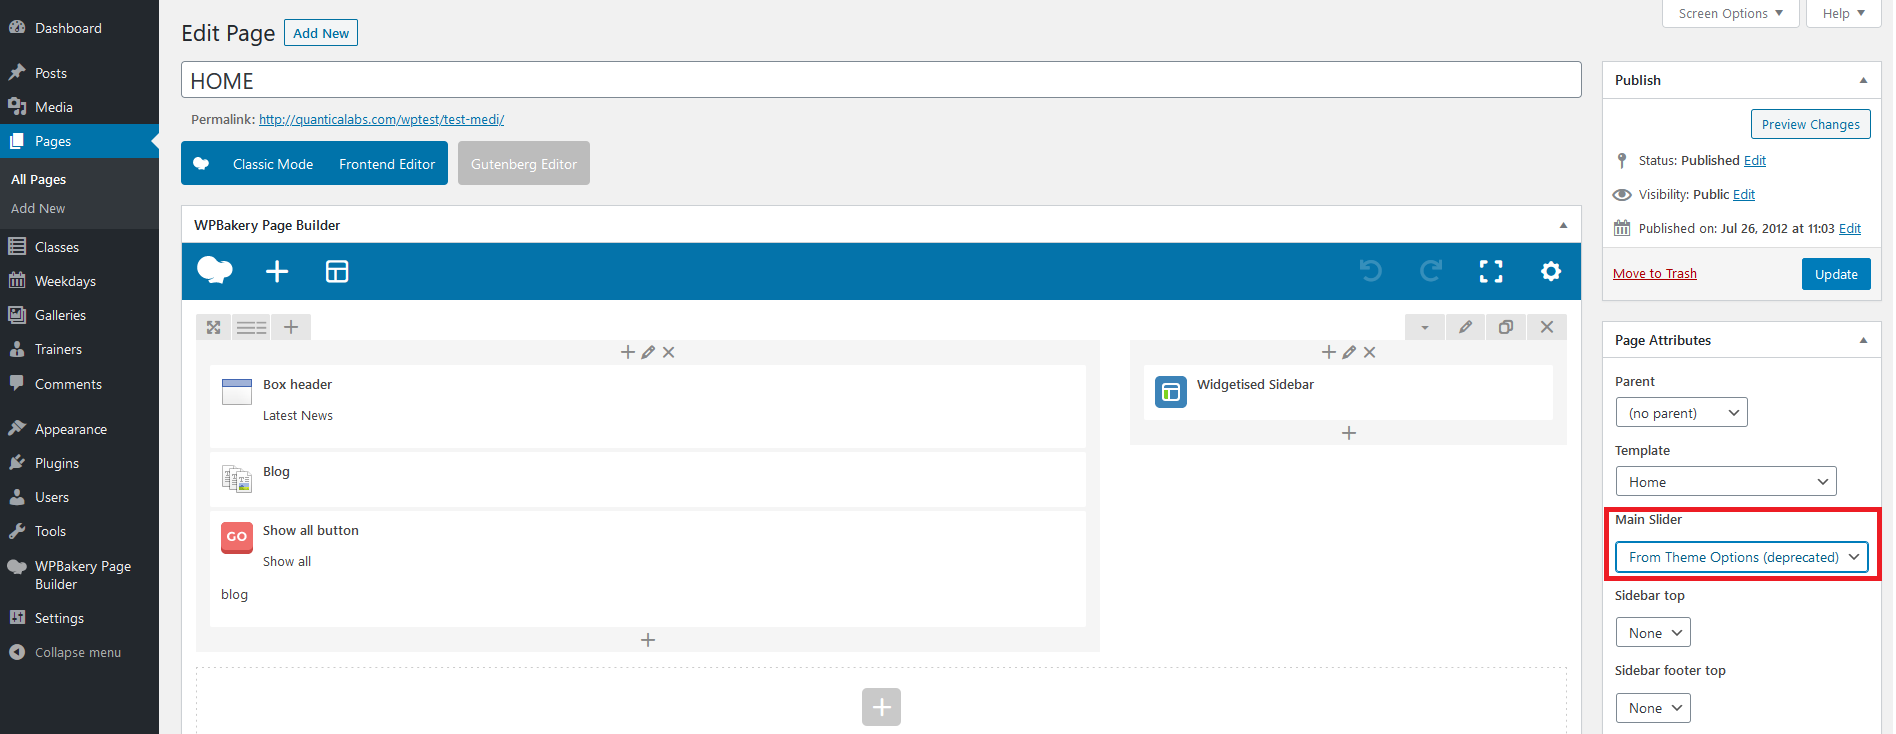
If you would like to keep displaying old slider (deprecated), please open your home page for edit and select 'From Theme Options (deprecated)' under 'Main Slider' dropdown (screen).
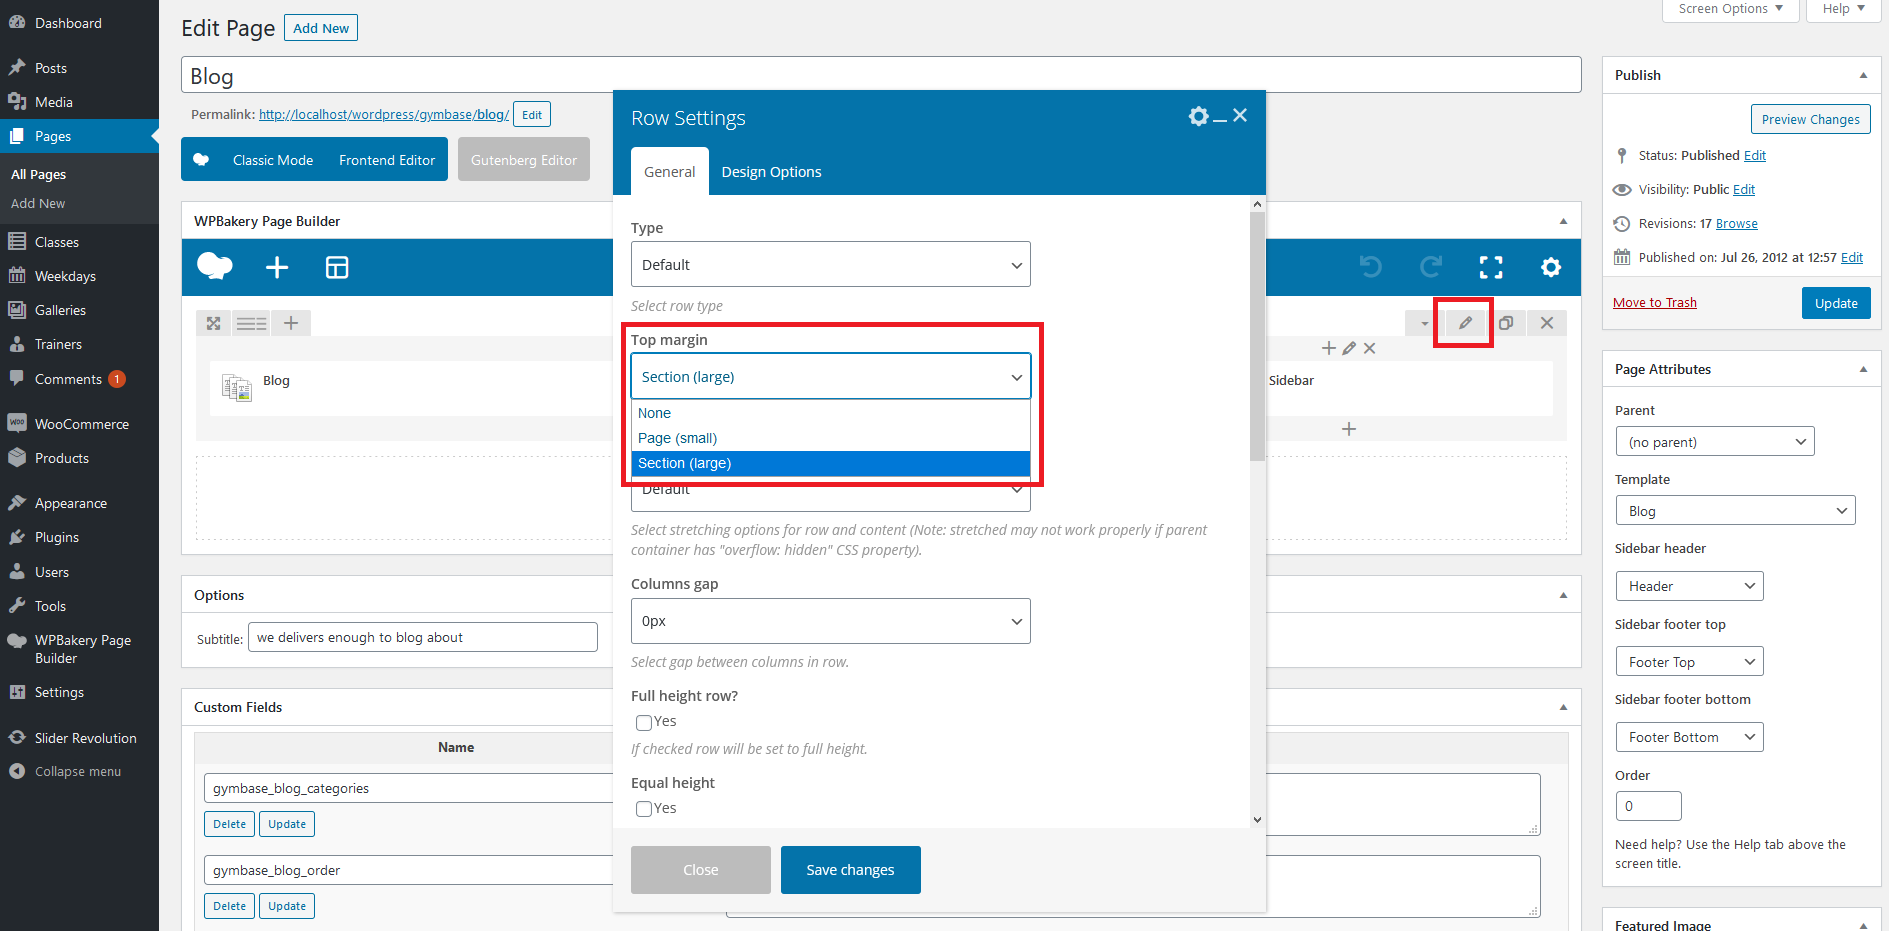
3. Default margin values for components has been set to 'None'. If after theme update you see spacings/margins layout problems, please open particular row component settings and set 'Top margin' value (screen).
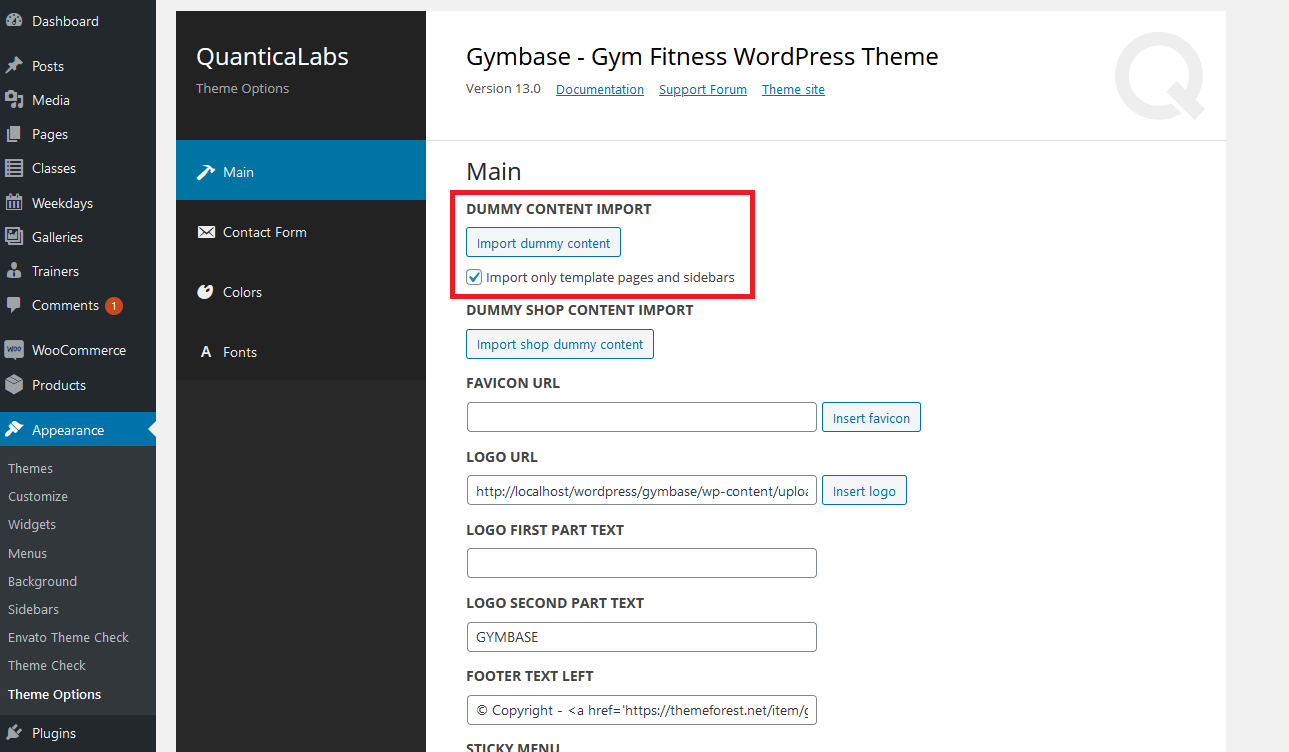
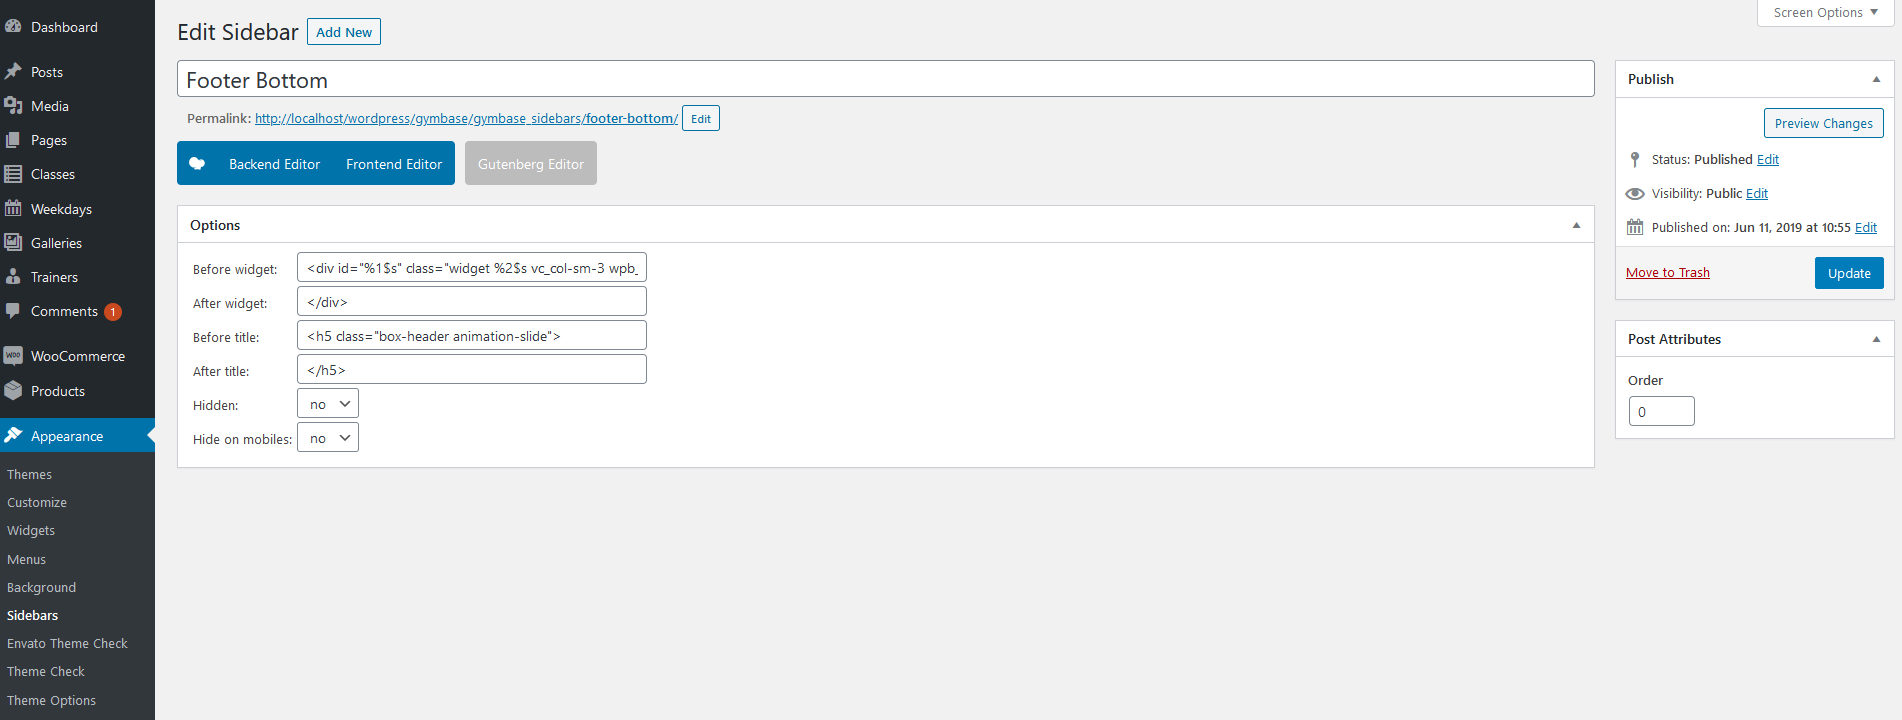
4. Sidebar Footer Bottom is displaying 4 columns now instead of 3. If you would like to have 4 columns there, please first import new sidebars under 'Appearance->Theme Options' by checking 'Import only template pages and sidebars' and clicking 'Import dummy content' button (screen). Then go to 'Appearance->Sidebars' and choose 'Footer Bottom' for edit. Then set below values in the configuration (screenshot):
'Before widget':
<div id='%1$s' class='widget %2$s vc_col-sm-3 wpb_column vc_column_container'>'After widget':
</div>'Before title':
<h5 class='box-header animation-slide'>'After title':
</h5>
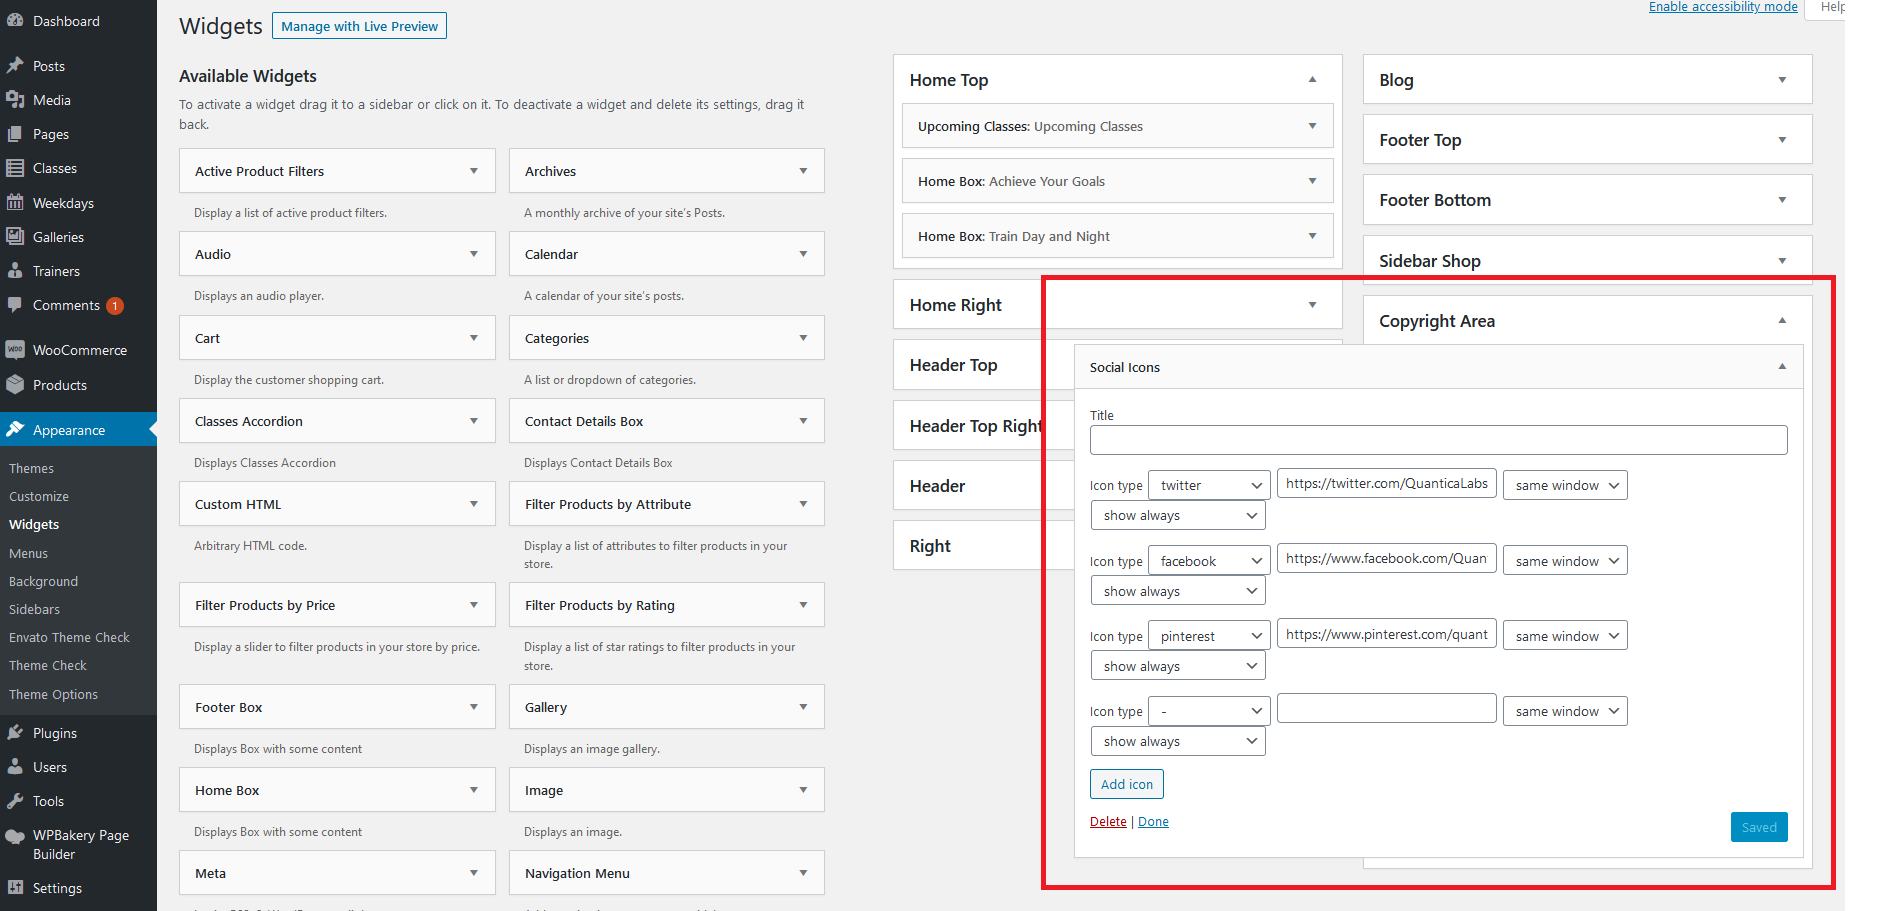
5. There is new 'Sidebar Copyright Area' available. After you will import new sidebars under 'Appearance->Theme Options' by checking 'Import only template pages and sidebars' and clicking 'Import dummy content' button (screen) you will see it under 'Apperance->Widgets': (screenshot). You can use it for example to display 'Social Icons' widget.
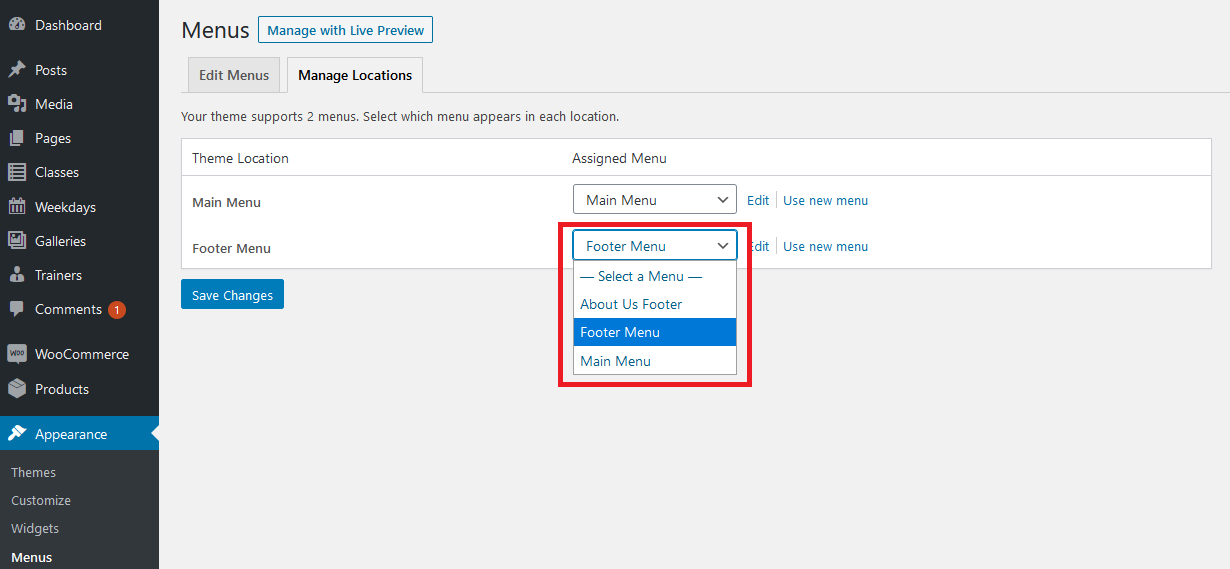
6. There is new menu location: 'Footer Menu'. You can assign menu to it under 'Appearance->Menus->Manage Locations' (screen).
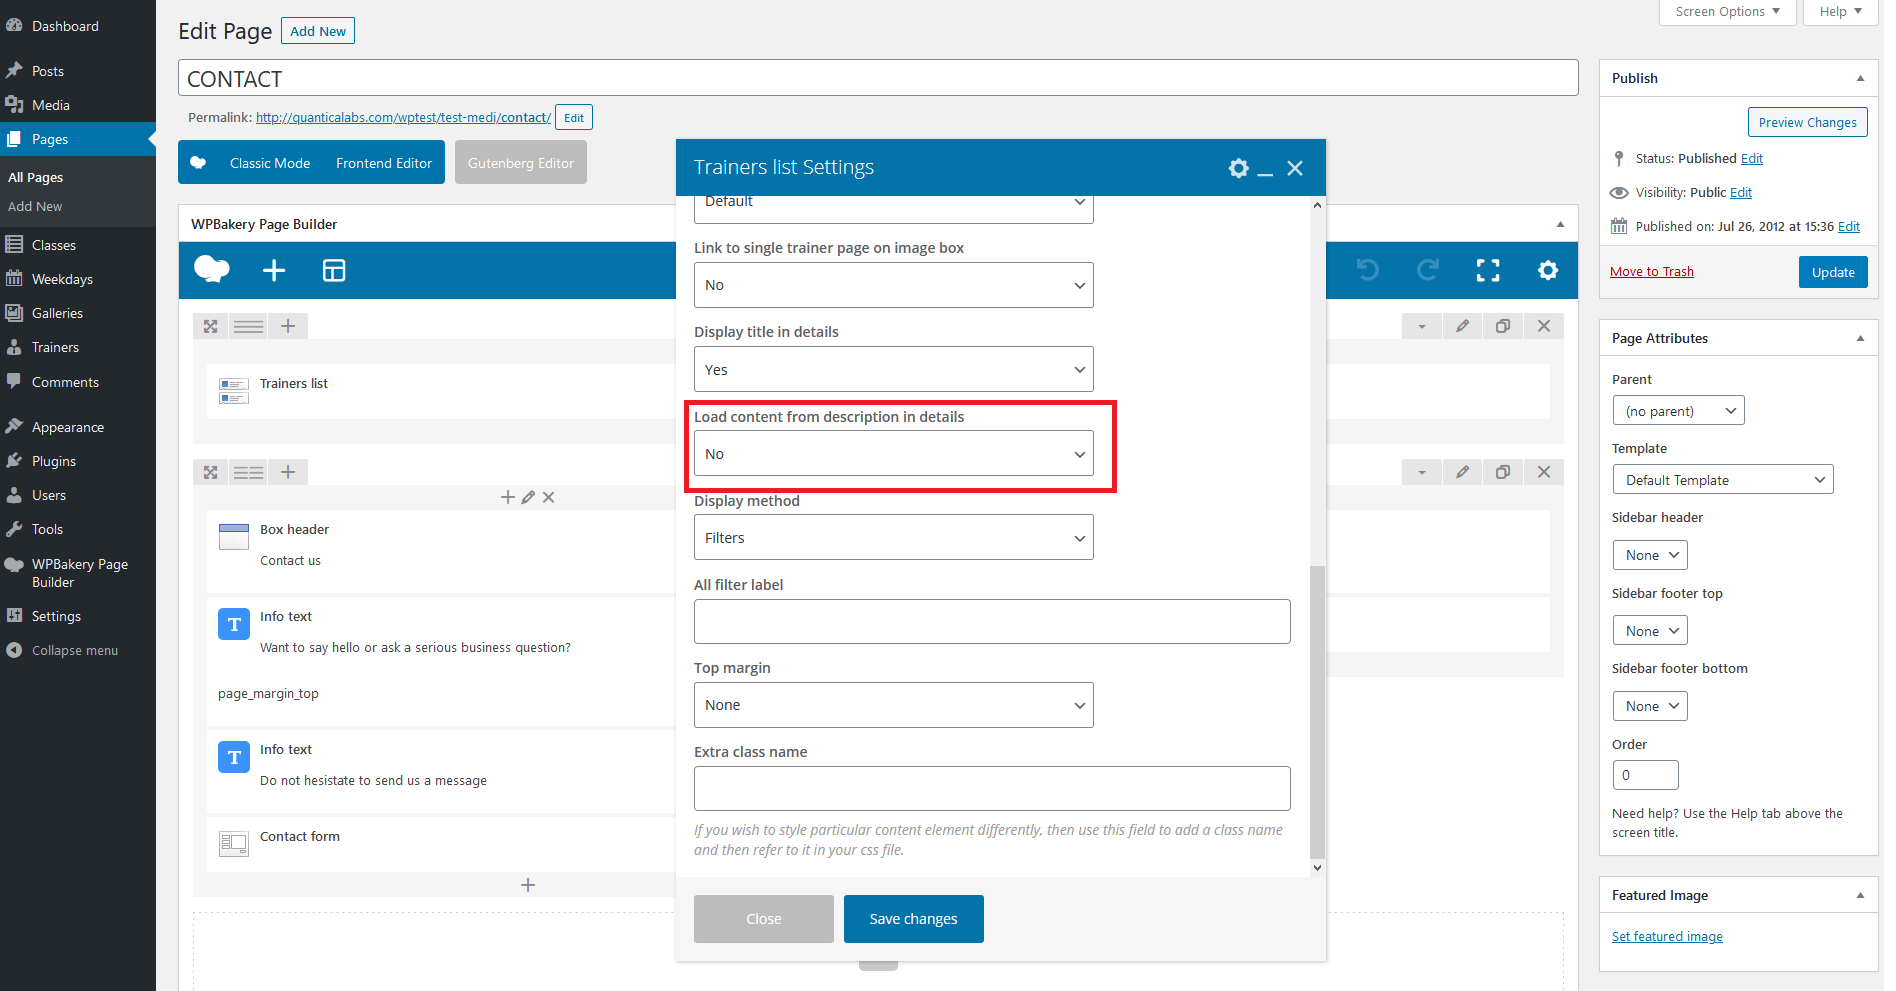
7. If trainers details are not displaying correctly for 'Trainers list' component, please under component settings set 'Load content from description in details' option to 'No' (screen).
8. For some pages you might get 404 error after update, to fix it simply go to 'Settings->Permalinks' in your WP Dashboard and click 'Save Changes' button there. WordPress will flush the rewrite rules which should help in this case.
9. You can use 'Regenerate Thumbnails' plugin to regenerate all images and make them compatible with current version of theme. You can download this plugin here.
10. YouTube and Vimeo links format has been updated. Please update your links for gallery items to new format. Vimeo: https://vimeo.com/%video_id% YouTube: https://www.youtube.com/watch?v=%video_id%
15. Have another questions?
Please check the FAQ section on our Support Forum.
Theme Structure
Project is divided by four main files: index.php, header.php, footer.php and functions.php
index.php
It's main project file which calls other. It contains get_header and get_footer calls.
header.php
The file contains head section of the html tree structure. You can find here also wp_head call.
footer.php
The file contains bottom part of the page, including copyright area and footer area. You can find here also wp_footer call.
functions.php
The file contains definition/includes of the functions for:
- widgets,
- shortcodes,
- sidebars,
- ajax calls,
- load javascript and css files,
- base configuration,
- menu generation,
- custom meta box and options pages.
WPBakery Page Builder
WPBakery Page Builder documentation is available here.
Widgets
There are 9 build in widgets:
- Cart Icon,
- Home Box,
- Footer Box,
- Upcoming Classes,
- Classes Accordion,
- Contact Details Box,
- Scrolling Most Commented Posts,
- Scrolling Most Viewed Posts,
- Scrolling Recent Posts,
- Social Icons,
- Twitter Feed.
You can see how to configure widgets on this video.
Credits
Fonts used
- Raleway By Matt McInerney, Pablo Impallari, Rodrigo Fuenzalida, Igino Marini, SIL Open Font License, 1.1
https://fonts.google.com/specimen/Raleway, - Lato By Lukasz Dziedzic, SIL Open Font License, 1.1
https://www.google.com/fonts/specimen/Lato, - EB Garamond By Georg Duffner, SIL Open Font License, 1.1
https://fonts.google.com/specimen/EB+Garamond, - Arial - default system font,
- Streamline Icon Font
https://www.webalys.com/, - Template Icon Font By Multiple Designers, MIT License,
- Social Icon Font By Multiple Designers, MIT License.
Images
Premium images used for live preview purpose (not included in downloadable package):
- Active athlete man doing rowing workout By Photocreo Bednarek
https://stock.adobe.com/pl/images/active-athlete-man-doing-rowing-workout/180224799, - Man and woman with barbell flexing muscles in gym By Syda Productions
https://stock.adobe.com/pl/images/man-and-woman-with-barbell-flexing-muscles-in-gym/74967223, - Fit people working out using machines By WavebreakmediaMicro
https://stock.adobe.com/pl/images/fit-people-working-out-using-machines/94051073, - Women couple training over steppers in aerobic class By David Pereiras
https://stock.adobe.com/pl/images/women-couple-training-over-steppers-in-aerobic-class/92856374, - Happy Young Couple Running on Treadmill Device By Flamingo Images
https://stock.adobe.com/pl/images/happy-young-couple-running-on-treadmill-device/86046071, - Exercising with gymnastic rings By grki
https://stock.adobe.com/pl/images/exercising-with-gymnastic-rings/162336611, - Woman working quads By xalanx
https://stock.adobe.com/pl/images/woman-working-quads/63962801, - Senior woman exercise abdominal in fitness center By CandyBox Images
https://stock.adobe.com/pl/images/senior-woman-exercise-abdominal-in-fitness-center/39727445, - Personal trainer helps the girl to do exercises in the gym By Dmitriy Shipilov
https://stock.adobe.com/pl/images/personal-trainer-helps-the-girl-to-do-exercises-in-the-gym/193656949, - Female personal trainer motivating a young man lift weights By javiindy
https://stock.adobe.com/pl/images/female-personal-trainer-motivating-a-young-man-lift-weights/142776058, - Apparatus and equipment in modern gym By zhu difeng
https://stock.adobe.com/pl/images/apparatus-and-equipment-in-modern-gym/98766161, - A girl performs a dumbbell with one hand in the slope using a bench. exercise on the broadest back muscles with dumbbells side view By satyrenko
https://stock.adobe.com/pl/images/a-girl-performs-a-dumbbell-with-one-hand-in-the-slope-using-a-bench-exercise-on-the-broadest-back-muscles-with-dumbbells-side-view/239009385, - Woman during workout with trainer By Photographee.eu
https://stock.adobe.com/pl/images/woman-during-workout-with-trainer/145891767, - Group of men flexing muscles with barbell in gym By Syda Productions
https://stock.adobe.com/pl/images/group-of-men-flexing-muscles-with-barbell-in-gym/73183862, - Little Girl Climbing Rock Wall By altanaka
https://stock.adobe.com/pl/images/little-girl-climbing-rock-wall/58372701, - Couple training in gym together By Kaspars Grinvalds
https://stock.adobe.com/pl/images/couple-training-in-gym-together/183670286, - Back view of slim athletic woman with muscular body holding barbell exercising in gym. Concept of strength, health and endurance By Stasique
https://stock.adobe.com/pl/images/back-view-of-slim-athletic-woman-with-muscular-body-holding-barbell-exercising-in-gym-concept-of-strength-health-and-endurance/97551998, - Sporty young woman posing on black background By Africa Studio
https://stock.adobe.com/pl/images/sporty-young-woman-posing-on-black-background/131157197, - Sportsman with crossed arms By LIGHTFIELD STUDIOS
https://stock.adobe.com/pl/images/sportsman-with-crossed-arms/170831220, - Sportsman doing lunges with trainer By LIGHTFIELD STUDIOS
https://stock.adobe.com/pl/images/sportsman-doing-lunges-with-trainer/170831305.
Images that are an integral part of this template, please do not use it separately for other purposes:
- Fitness young woman on gym bike spinning By CandyBoxImages
https://photodune.net/item/fitness-young-woman-on-gym-bike-spinning/350646, - Dumbbells in a row By IS2
https://photodune.net/item/dumbbells-in-a-row/960939, - bodybuilder man doing biceps muscle exercises By kadmy
https://photodune.net/item/bodybuilder-man-doing-biceps-muscle-exercises/2321595.
Images under creative commons attribution 2.0 generic (CC BY 2.0) for commercial use:
- love your body - 2 By lululemon athletica
https://www.flickr.com/photos/lululemonathletica/4906334228/, - love your body - 3 By lululemon athletica
https://www.flickr.com/photos/lululemonathletica/4906335200/, - Salutation Nation - 077 By lululemon athletica
https://www.flickr.com/photos/lululemonathletica/4870445028/, - Salutation Nation - 108 By lululemon athletica
https://www.flickr.com/photos/lululemonathletica/4869847135/, - Salutation Nation - 094 By lululemon athletica
https://www.flickr.com/photos/lululemonathletica/4869840809/, - Rolling By sportsandsocial
https://www.flickr.com/photos/sportsandsocial/2944270197, - Free weights By sportsandsocial
https://www.flickr.com/photos/sportsandsocial/2945528496/.
Changelog
Check the changelogSupport
Support for all our items is conducted through our Support Forum.
Please register an account and search the forum or create a new topic, we'll answer as soon as possible.
We're in GMT +1 and we aim to answer all questions within 24 hours (Monday – Friday). In some cases the waiting time can be extended to 48 hours.
Support requests sent during weekends or public holidays will be processed on next Monday or the next business day.
Need HTML (non - WordPress) version?
There is also HTML version of this theme available. You can find it here: GymBase - Gym Fitness Template